RE-IMGN
Luke Dunn
The Wood Co-Op/Forestry Innovation Investment in Wood Design Industrial Design Graduation Award: Winner
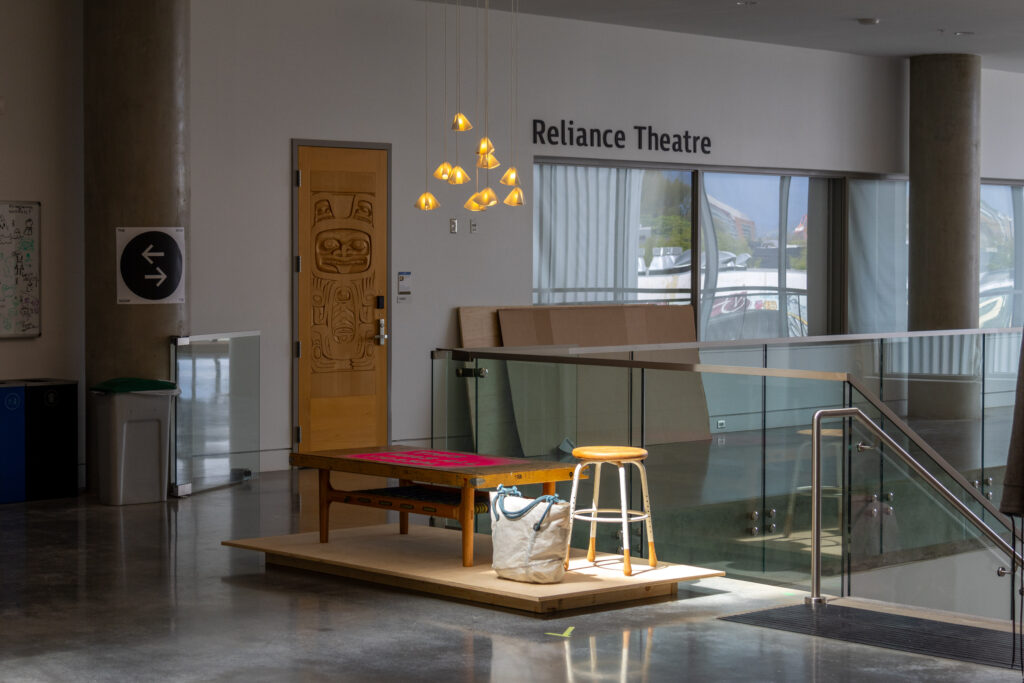
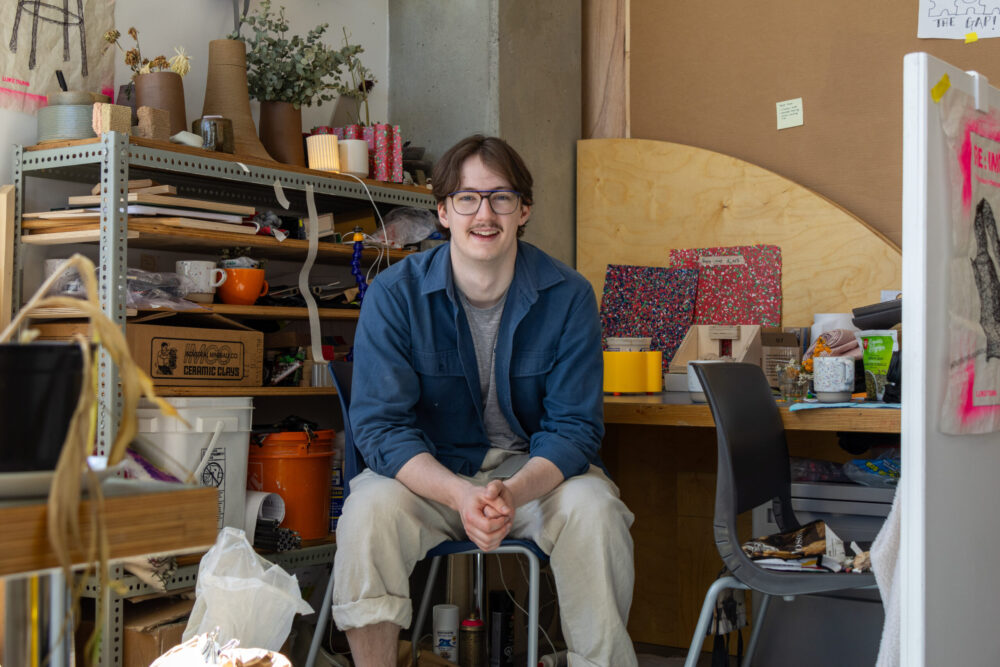
Hi, I’m Luke, this is my 4th year project RE-IMGN, Finding value in disregarded materials. A project about doing more with less.
This project investigates the role of craft and considered design in shaping a more environmentally sustainable future. In a society driven by a constant demand for new products, a cultural shift toward slower, more responsible consumption is necessary, though it will not happen overnight. While we work on that shift, we can ease some of the pressure by making things that last. Both physically and emotionally, using materials that are already out there and might otherwise go to waste. I believe that when people design and make for their own communities, using recycled and local materials, it leads to more meaningful, sustainable objects for the future.
It’s not the objects themselves that are important, it’s the process and material exploration that are at the heart of this project. My work can be divided into two interconnected parts, which I moved between throughout the year: a material research and exploration practice, and a material engagement practice. In the material engagement practice, I worked with found objects and waste materials, creating new pieces from what I discovered in my environment. These objects were more personal and intuitive — they came from what I wanted to make in response to the materials I encountered. The material research and exploration practice, however, is the more significant part of the project, and feels more aligned with its deeper message. I’m really proud of the work I did in this area, and I’m excited to keep developing the ideas I began exploring.
Find my work interesting, or want to make inquiries about pieces: Contact Me
Project element directory:
- Recycled Glass Pendant Lights
- Construction Wood Waste, Retired Climbing Rope and Found Object Coffee Table
- Construction Wood Waste, Found Object Stool
- Retired Sail and Retired Climbing Rope Tote Bag
- Material explorations
Recycled Glass Pendant Lights
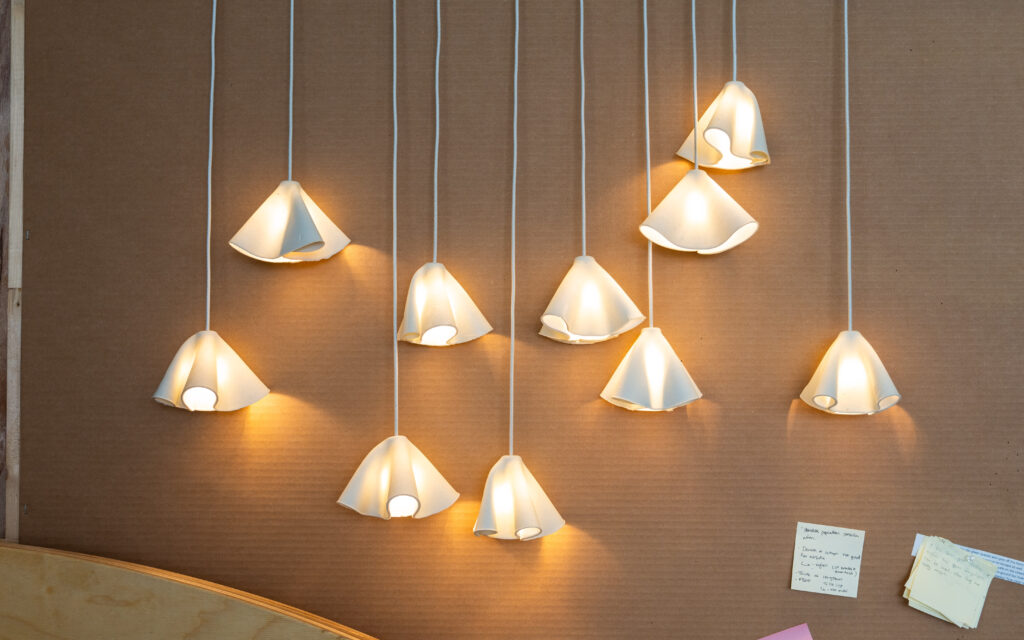
Pendant lights hung over wall below is the story of how the material was developed and how they were made.
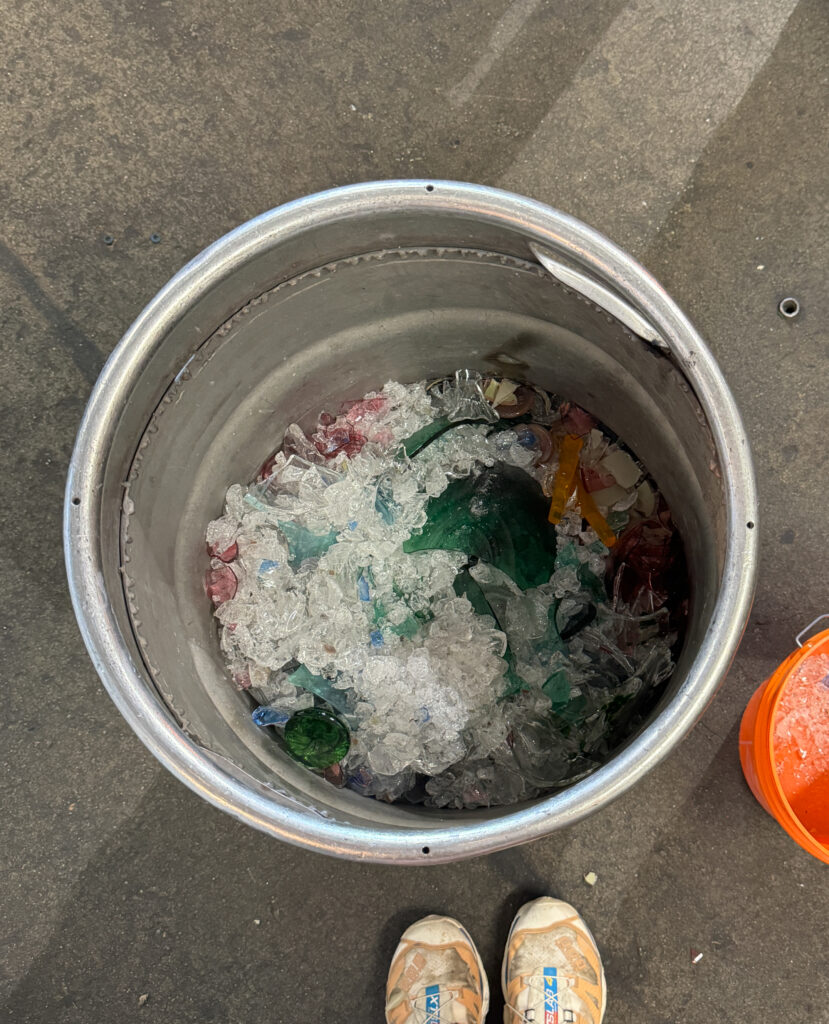
Waste coloured glass from Terminal City Glass – Glass blowing glass cannot be recycled into the regular bottle glass recycling system due to its difference in material properties, and as such is usually destined for the landfill. Terminal City produces 40kg + of waste glass a week.
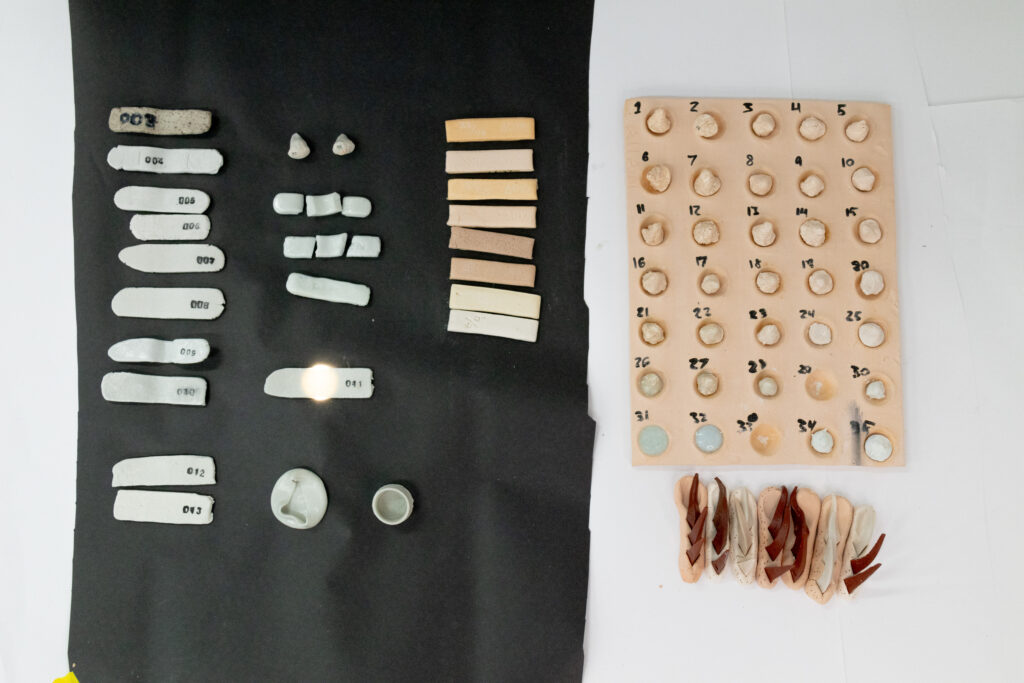
Some of my material testing to develop a fritware (an ancient type of ceramic with a high glass content and low melting temperature) made from almost 65% waste glass. The glass is ground into a flour like powder before being mixed into this material.
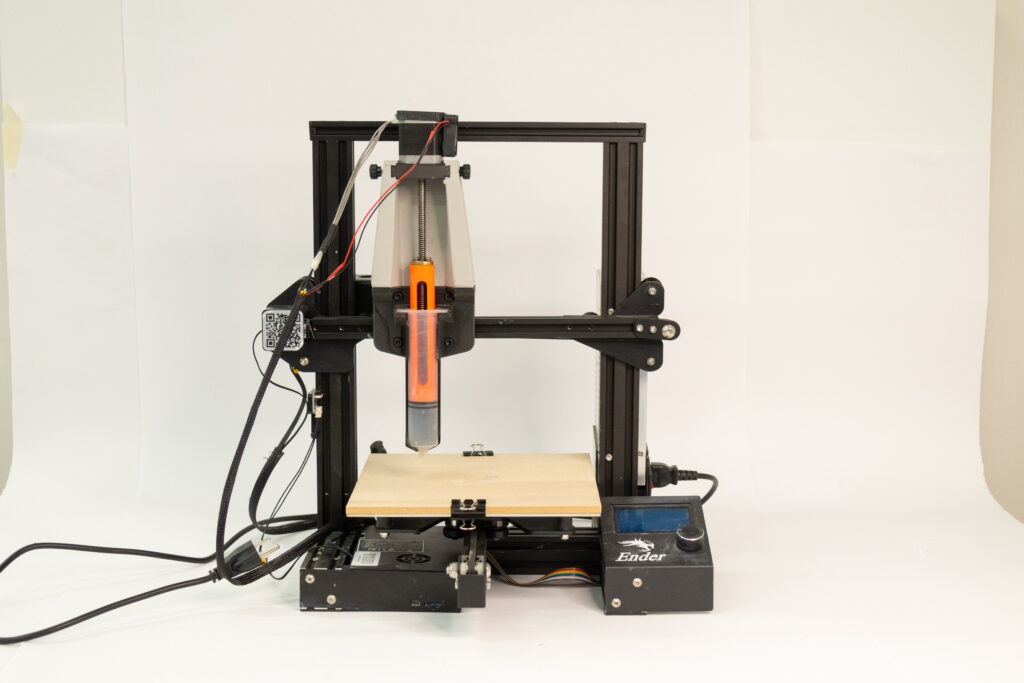
The fritware is difficult to work with by hand, it’s wet material properties sit somewhere between kenetic sand and porcelain. So, my solution was to 3D print the material. This was the first printer I modified to print the fritware, I wanted to be able to test small batches to compare recipes. However this design lacked sufficient power to print the material.
I then moved on to a less radical modification for the exturder system of our existing clay printers here at Emily Carr. This did work, but only barely, and was very prone to clogging.
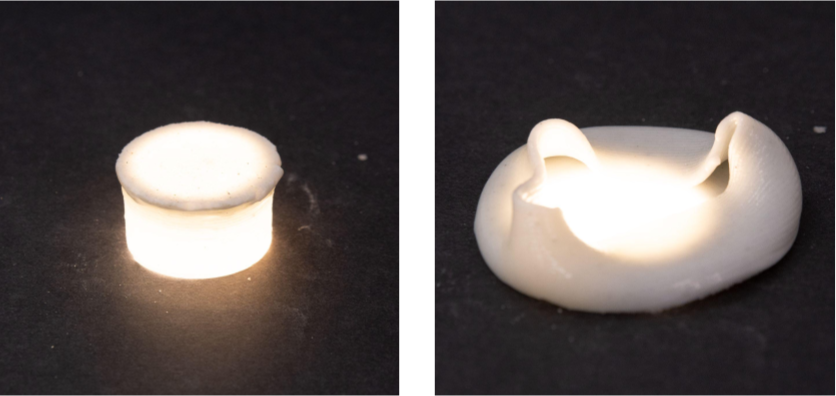
These were the only two samples I was able to print with this machine, the one on the left was a cylinder to begin with but slumped over during the firing (a sign of future issues)
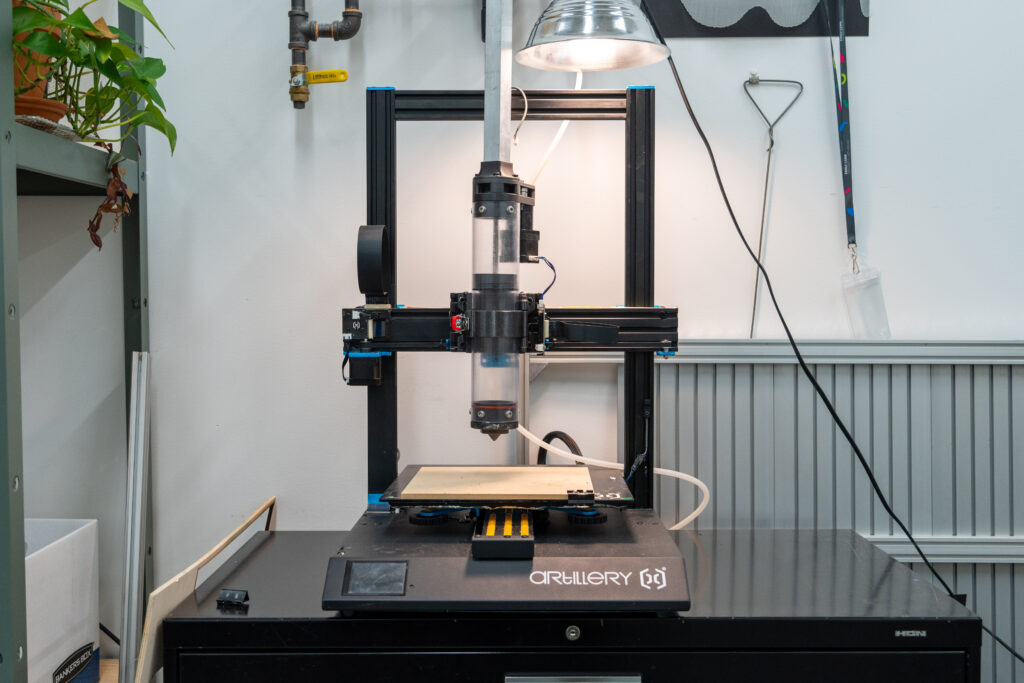
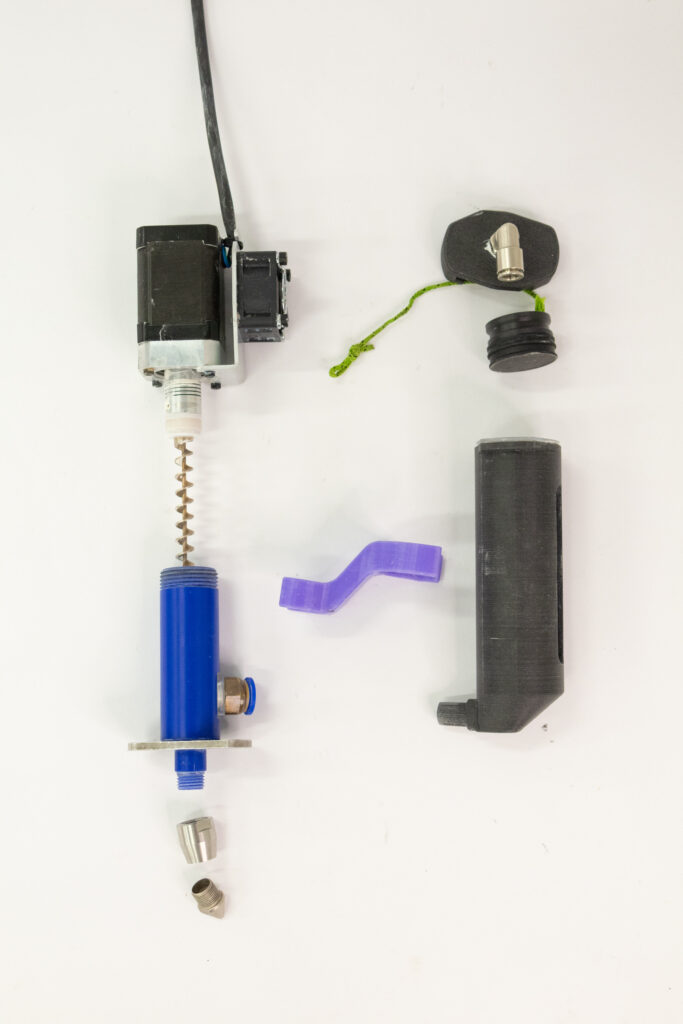
So I invested the time to build a purpose designed extruder system to print the fritware. The mechanism is quite simple, a stepper motor with a gearbox provides a lot of torque which is transferred into linear motion through a lead screw, exerts a lot of pressure on the fritware, pushing it out of the tube. My exturder is mounted on an old, but beefy 3D printer I purchased off of marketplace and then modified to fit my needs.
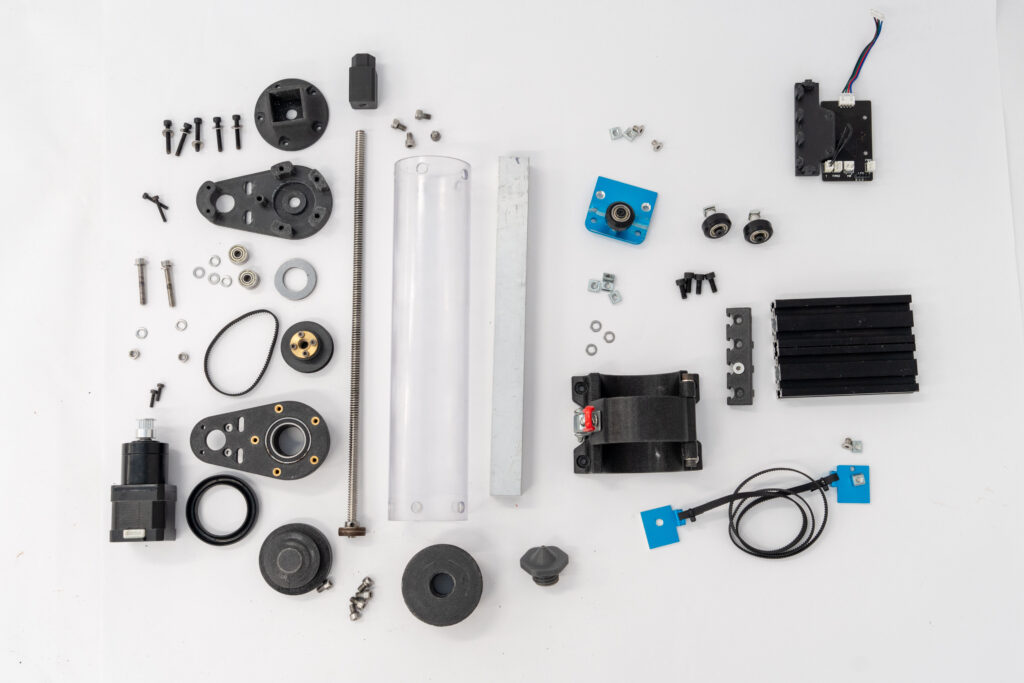
A disassembled view of the extruder
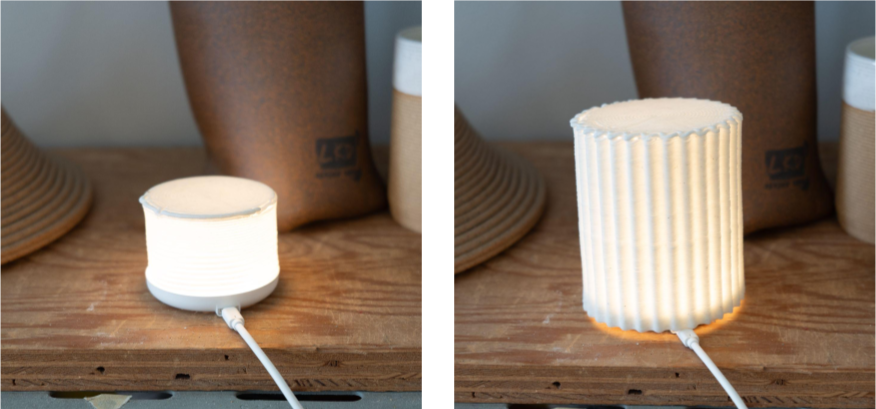
The new printer was very successful, printing these two objects without issue.
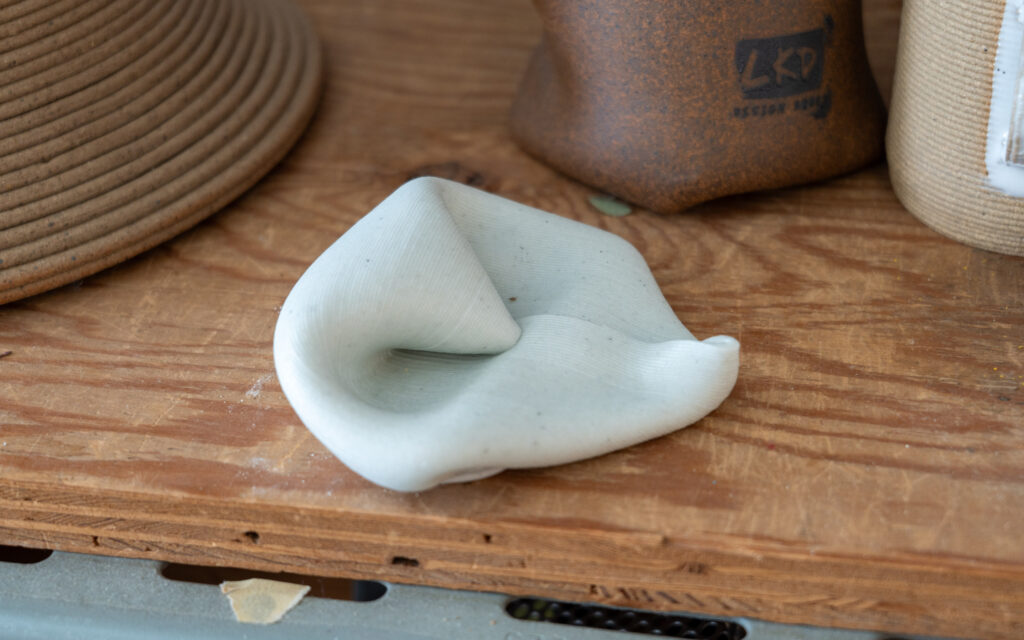
However, as I ventured into printing more complex forms, I began to encounter more difficulties with slumping in the kiln. I decided to investigate this further, and started to think more about how I might use this to create form, as I find these failed objects quite beautiful.

I first tested this by trying to edit the form of a cylinder, as while I could extrude the cylinder, any attempt to alter its shape while wet would lead to it to rip and crumble. So I decided to mold or edit the form in the kiln using this slumping. I made furniture out of reclaim and kiln washed it to avoid it sticking to the fritware.
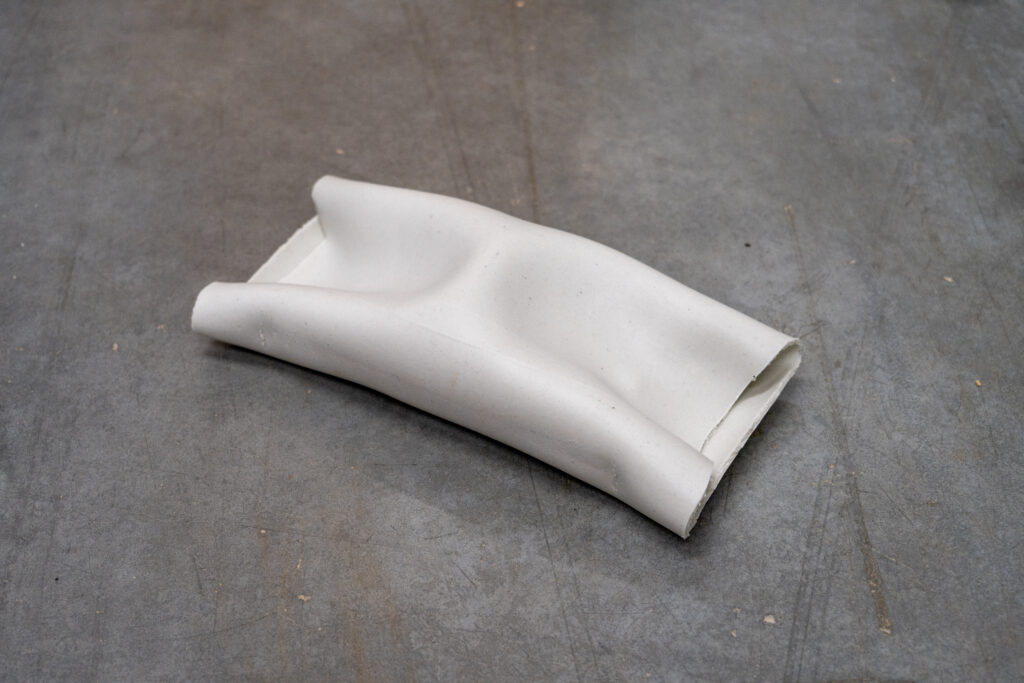
This shape is hard to capture through Images, with its large linear detent on the bottom and crease in the opposite direction on the top. I did some experiments with lighting this shape, but didn’t have time to finalize it. I hope to continue these experiments, including starting with a 3D printed form which is then slumped.
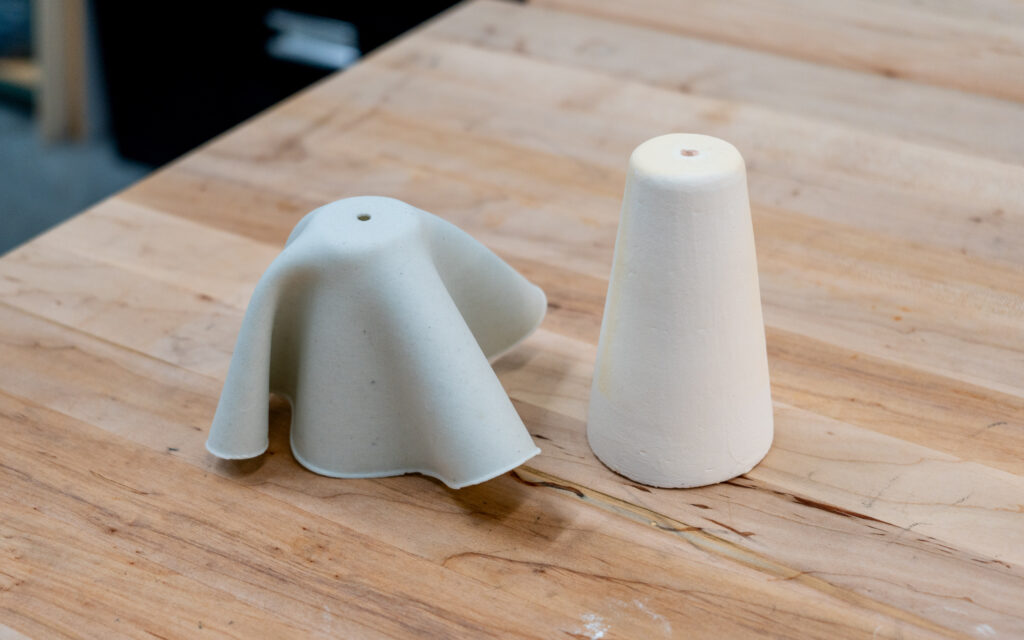
This was my first test, throwing a cone of reclaim clay, bisqing it, painting it with kilnwash, and then firing a disc of fritware on top. I loved the form, and saw its further potential.
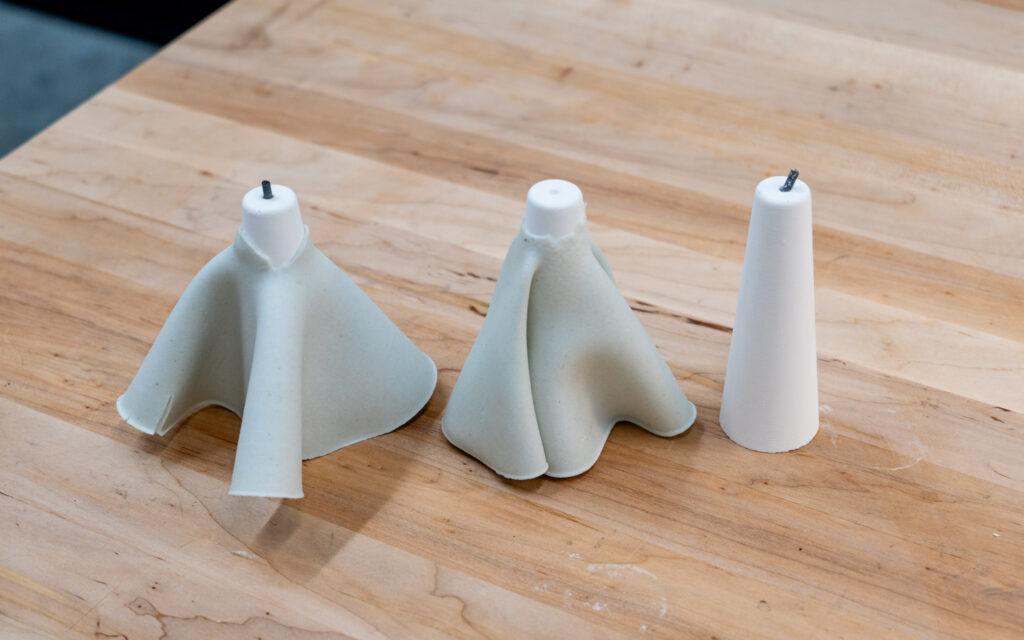
I next tried to fire them on narrower cones cast from silica-plaster, allowing for more regular top to interact with the electrical fixture I would have to design later. I struggled with this at first, having a few failures, but eventually I Ironed out my issues.
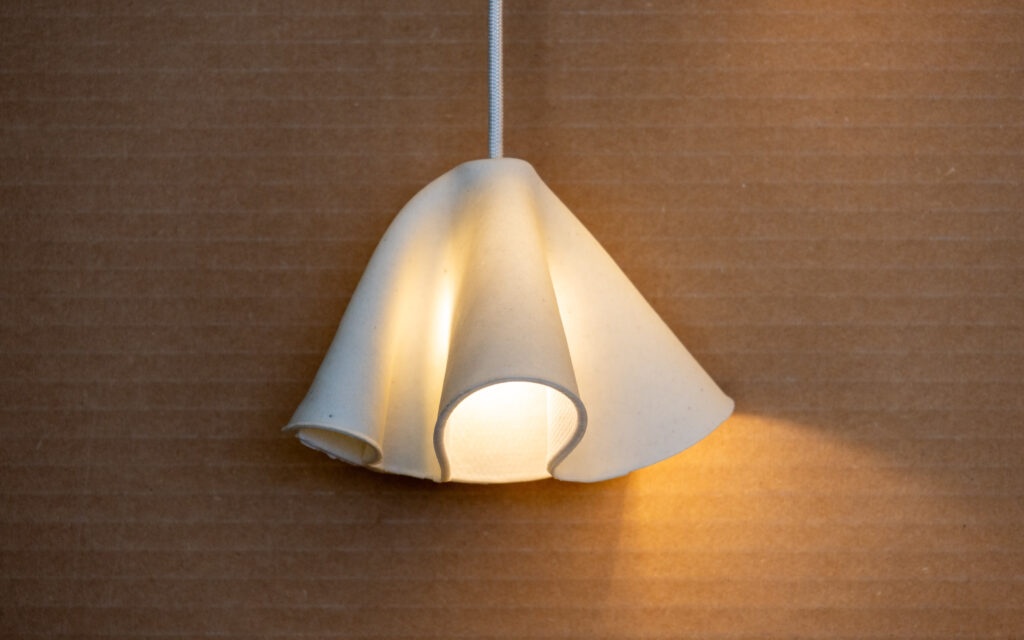
Resulting in the lights you see before you.
Construction Wood Waste, Retired Climbing Rope and Found Object Coffee Table
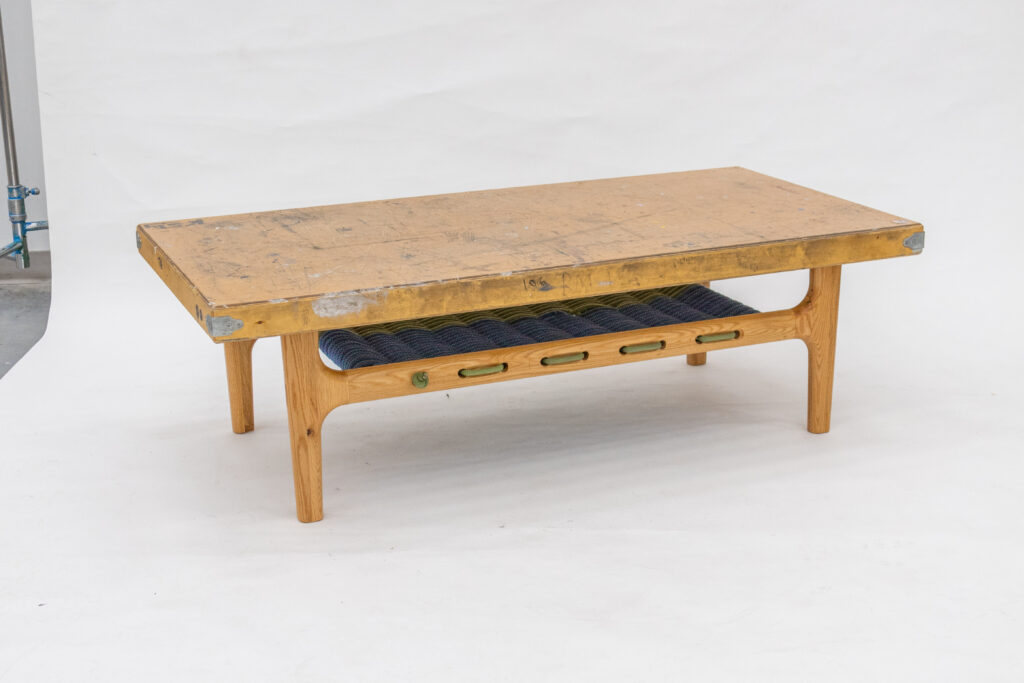
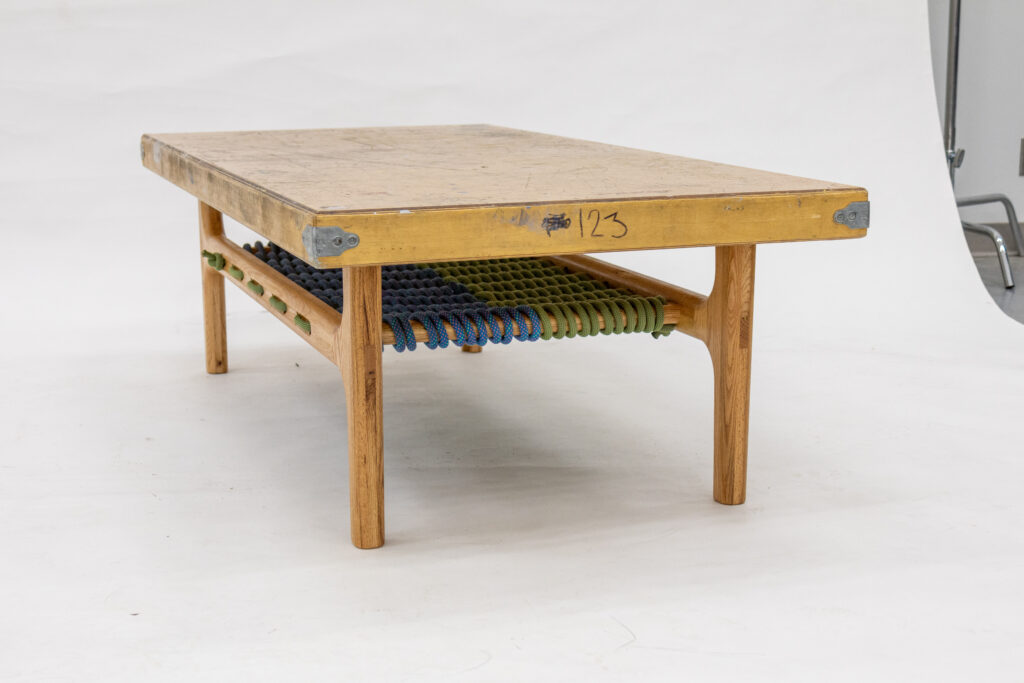
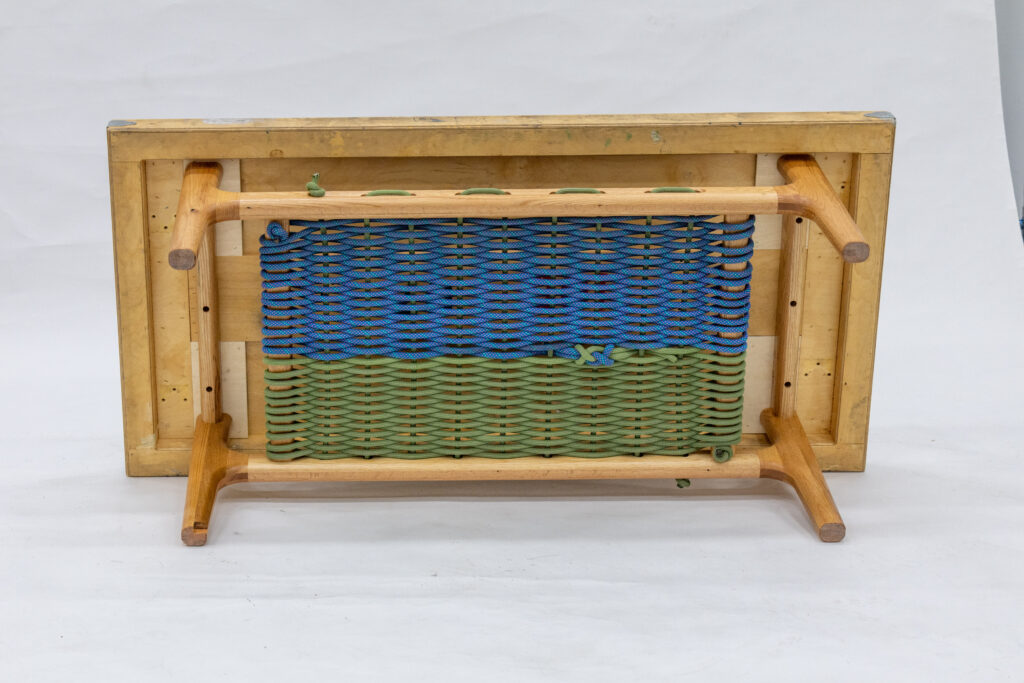
The Finished Coffee Table
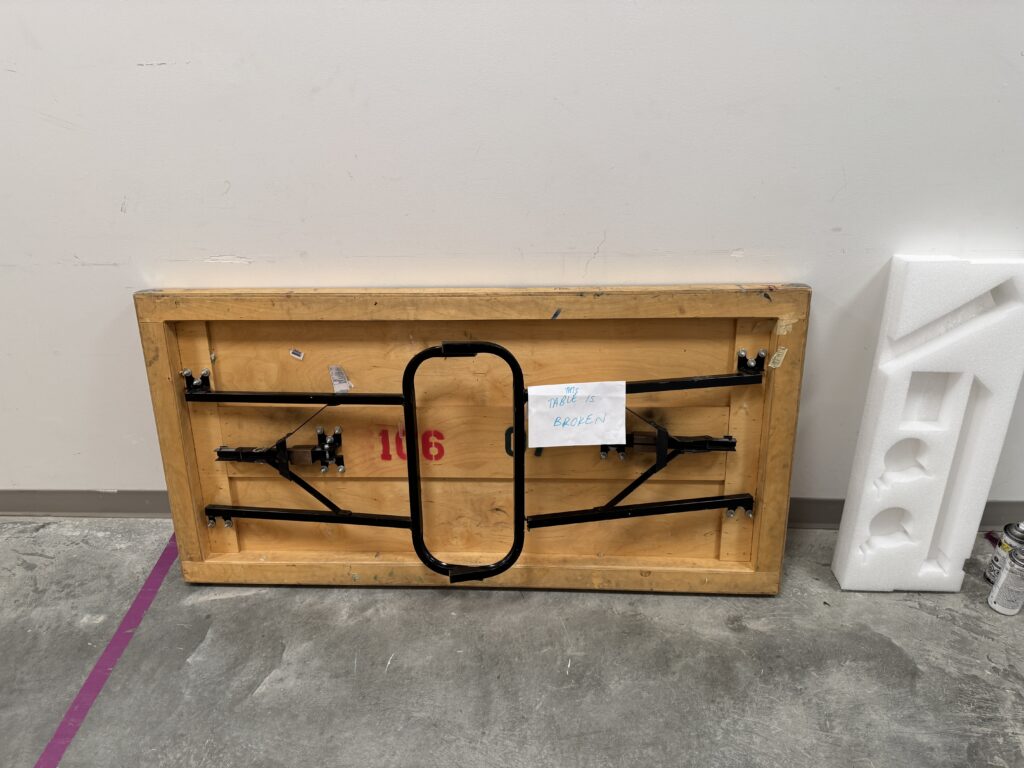
The Broken folding table I found in the hall, the legs had broken in several pieces and, weren’t very high quality in my opinion. But what made me really fall in love with it was the patina.
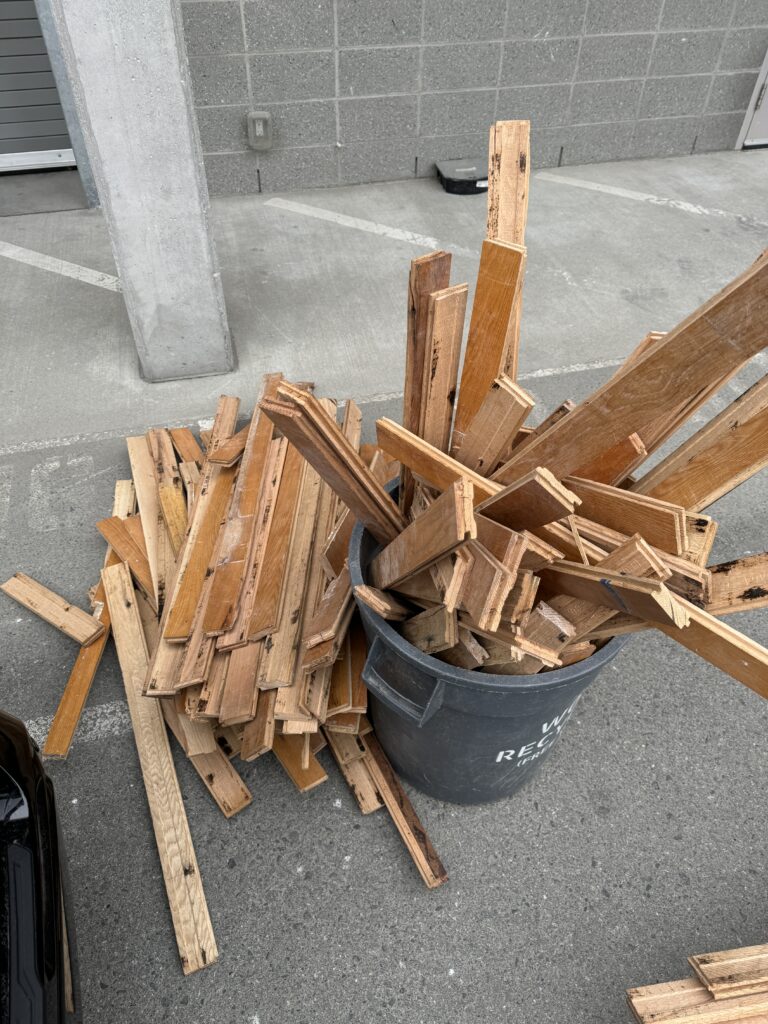
The discarded oak hardwood floors I took from a house that was getting demolished.
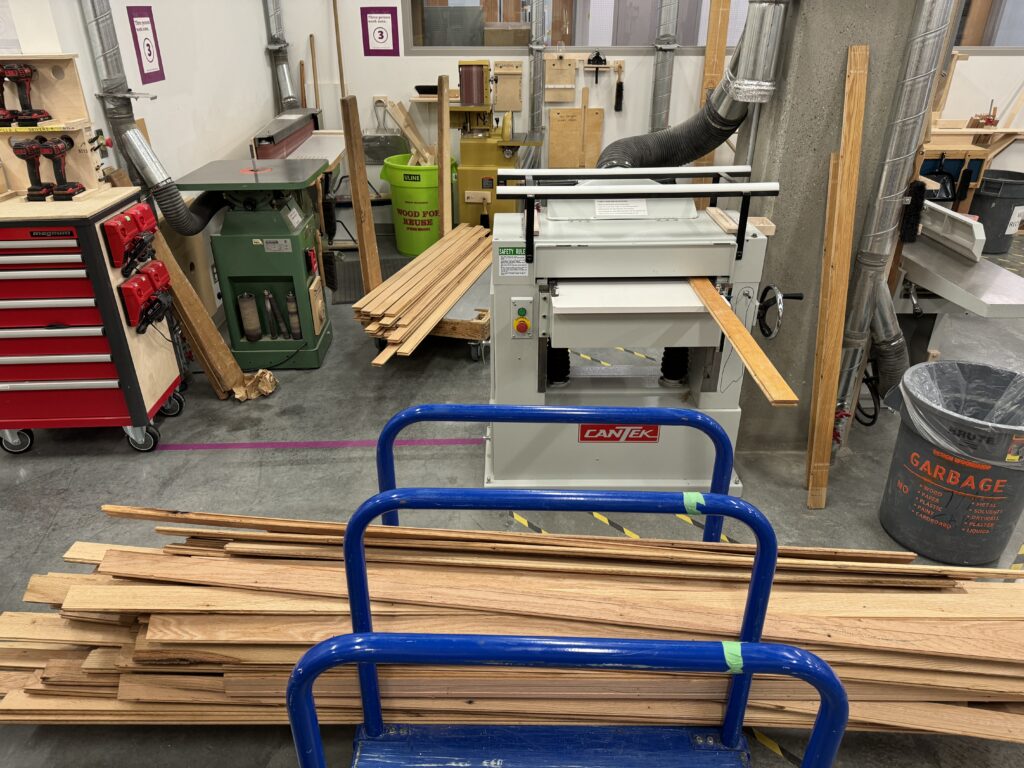
Planing and sorting the floor.
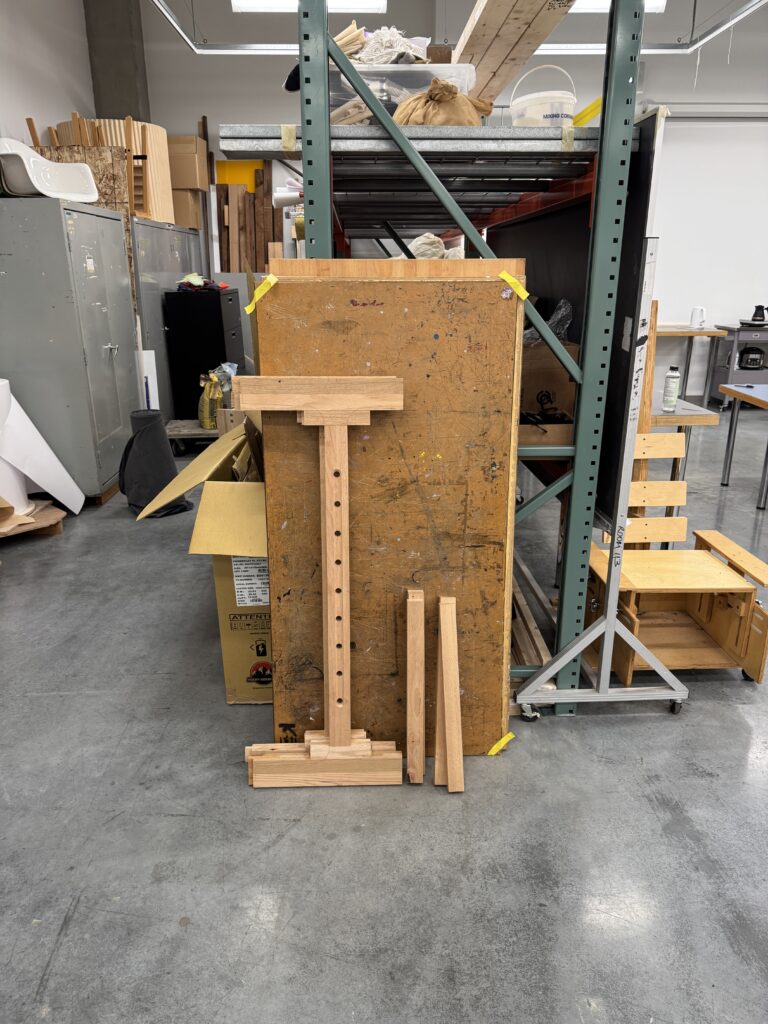
I laminated the legs together with a tenon joint for strength, and in a way to minimise waste.
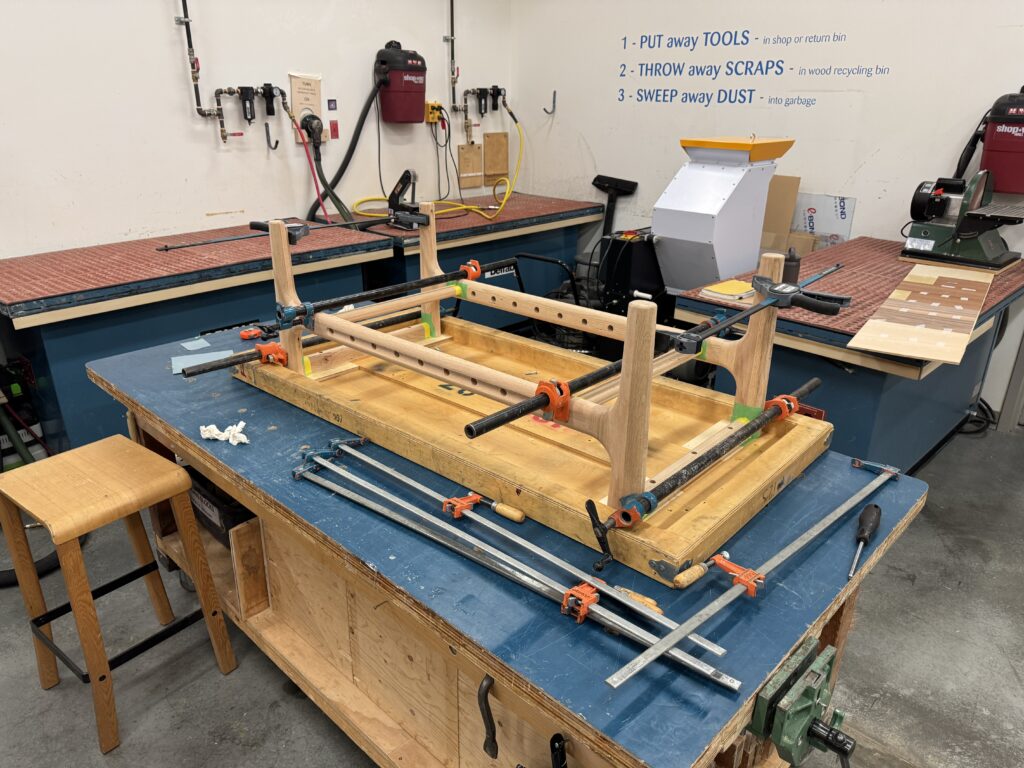
Glue Up – the cross pieces are dominoed in. I carefully separated the top skin off of the original desk, allowing me to remove the old hardware and re-use that hardware in a new orientation allowing for a seamless design.
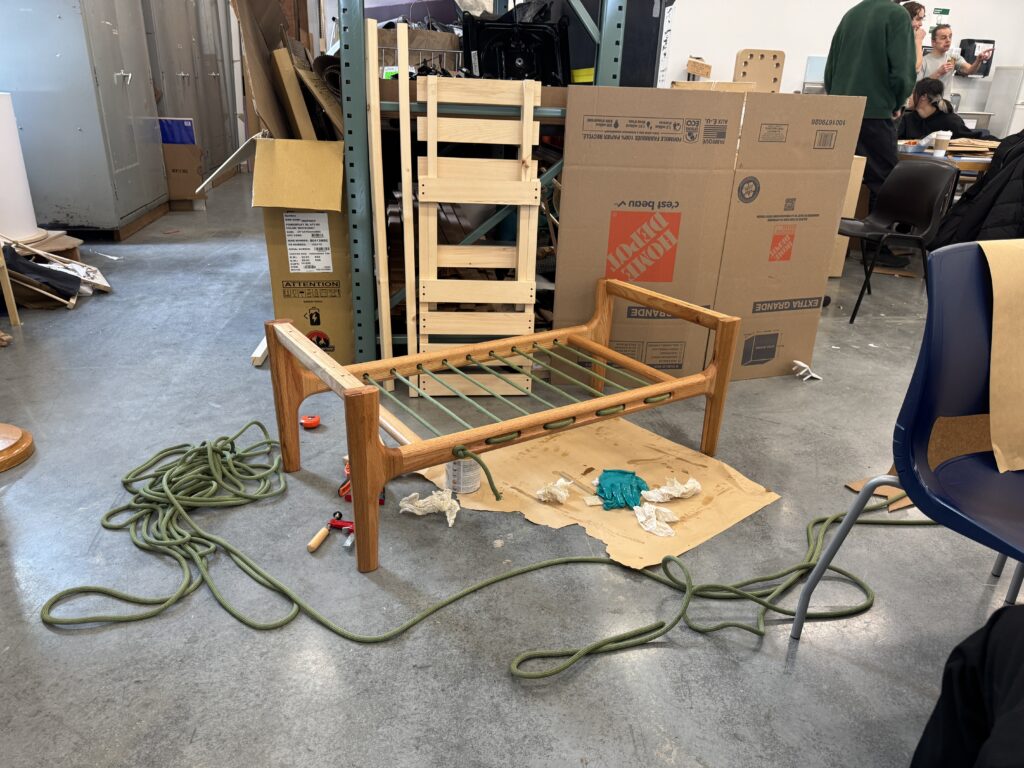
Weaving the warp through the legs.
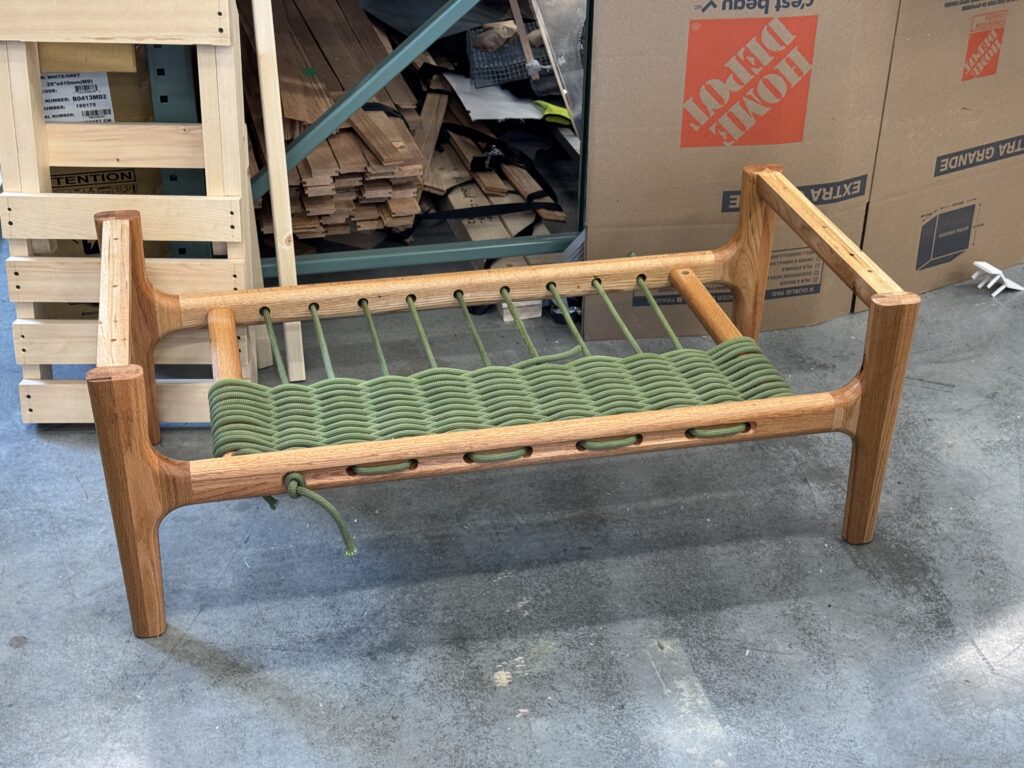
Weaving the weft. Unfortunately I had no matching ropes, so the colour changes halfway through.
Construction Wood Waste, Found Object Stool
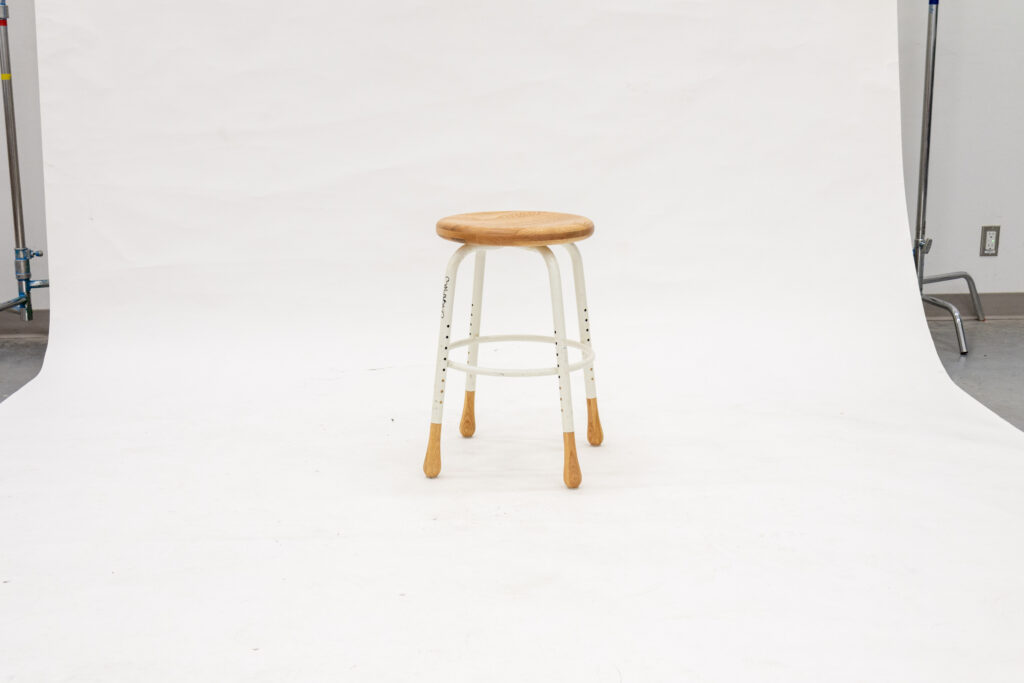
The finished stool.
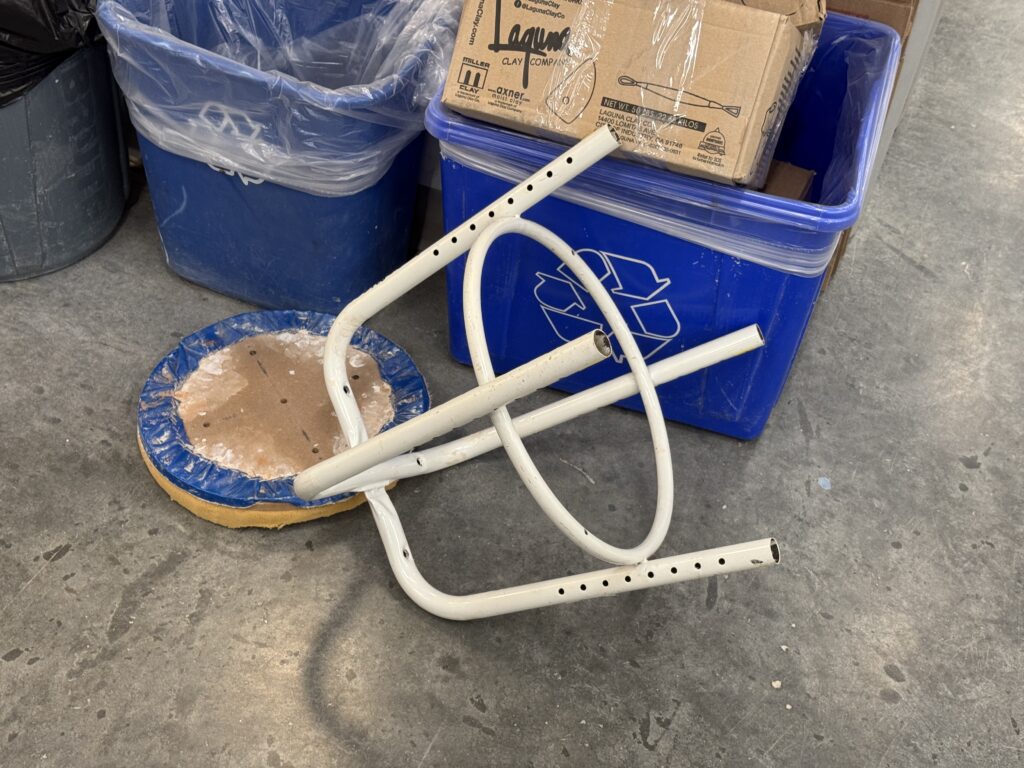
The stool how I found it, it had been used for parts by the ceramics department, and was then discarded.
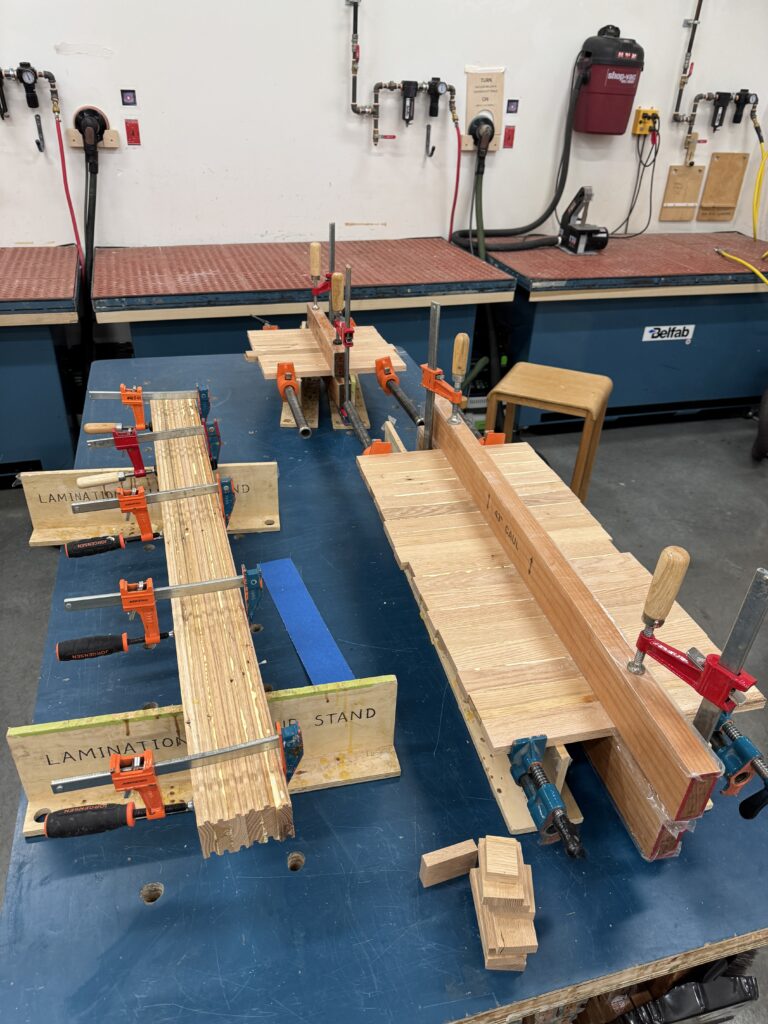
Most of the wood for this project was offcuts of the hardwood floors from me cutting them down so that they could be cut with the slide on the sliding table saw.
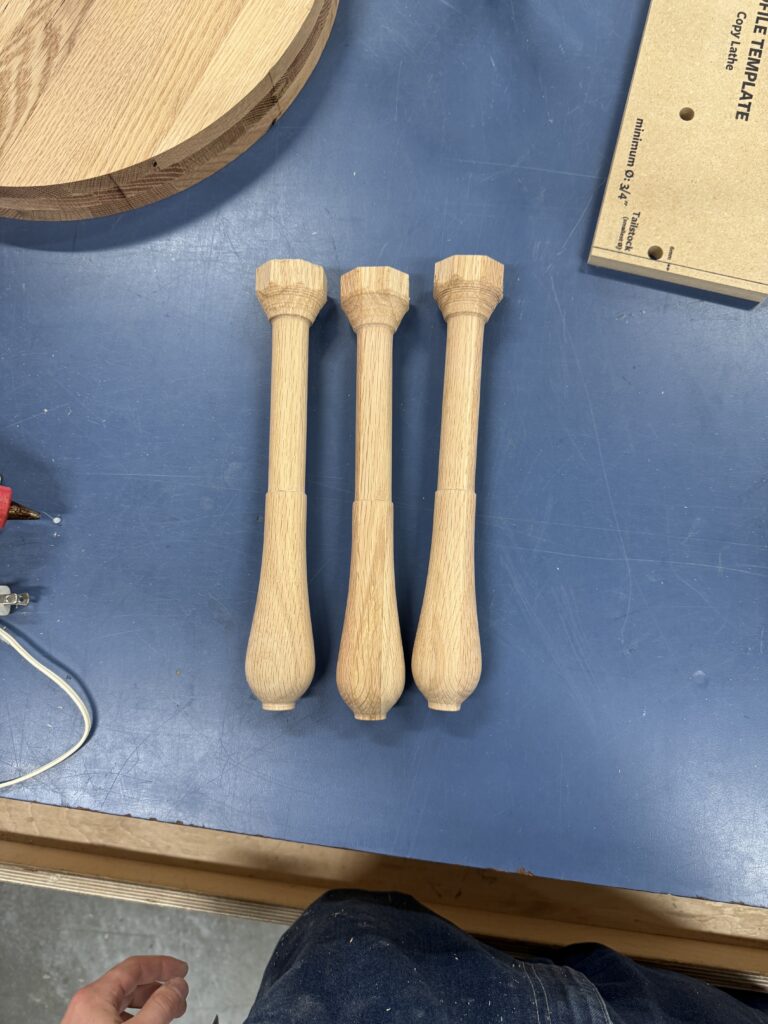
Legs off of the copy lathe.
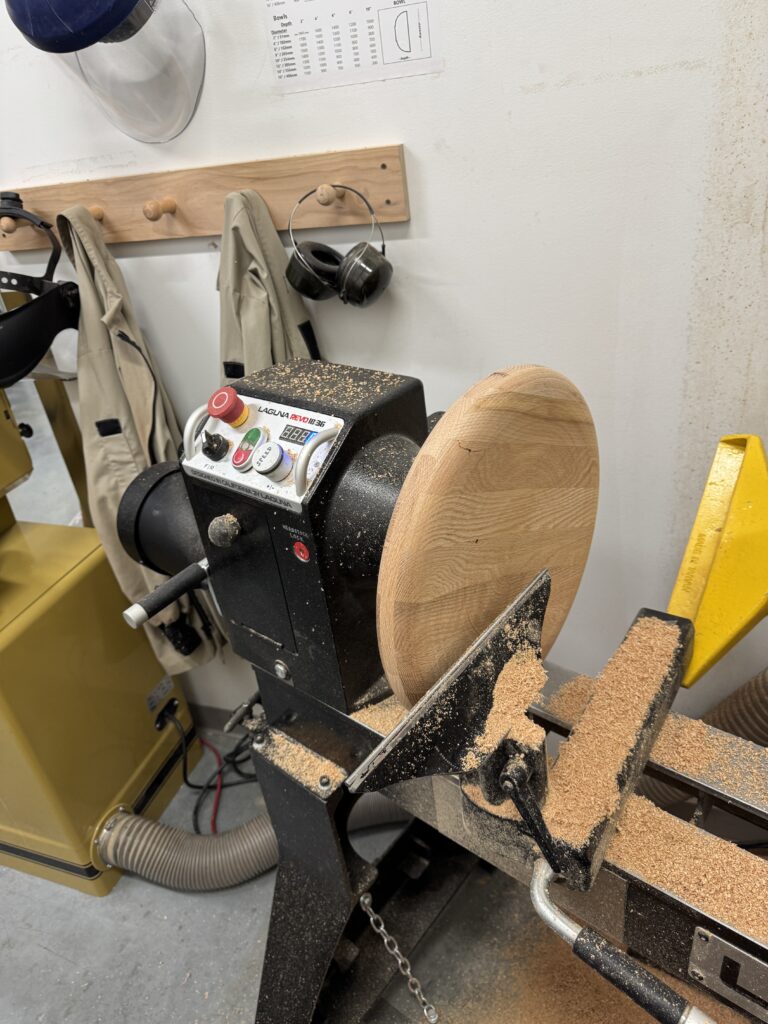
Top turned by hand on the lathe.
Retired sail and retired climbing rope tote bag
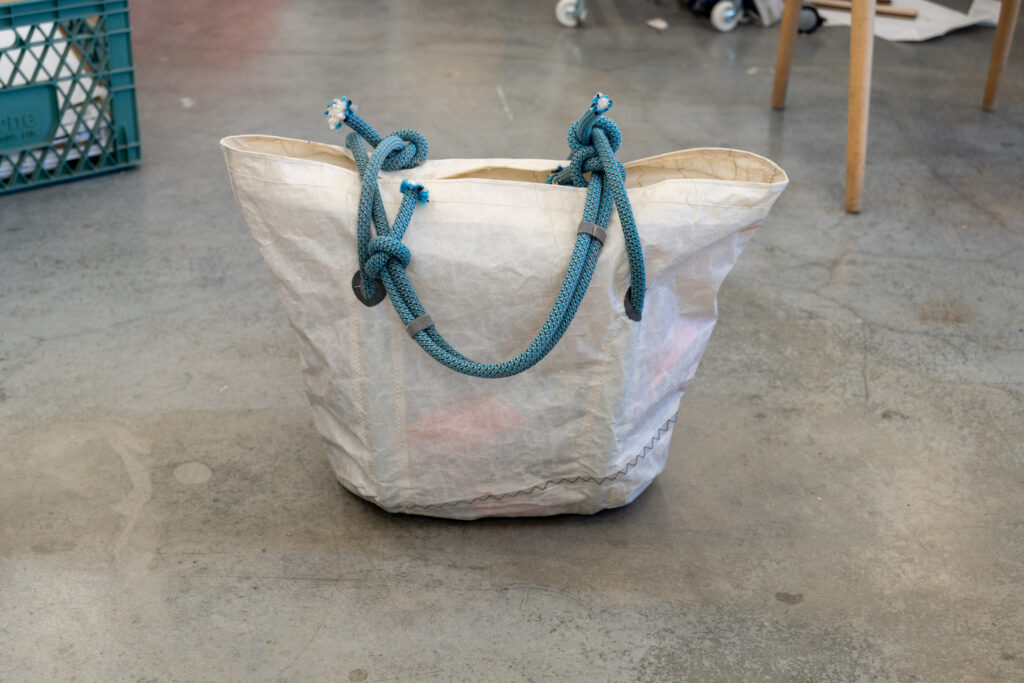
Finished Tote.
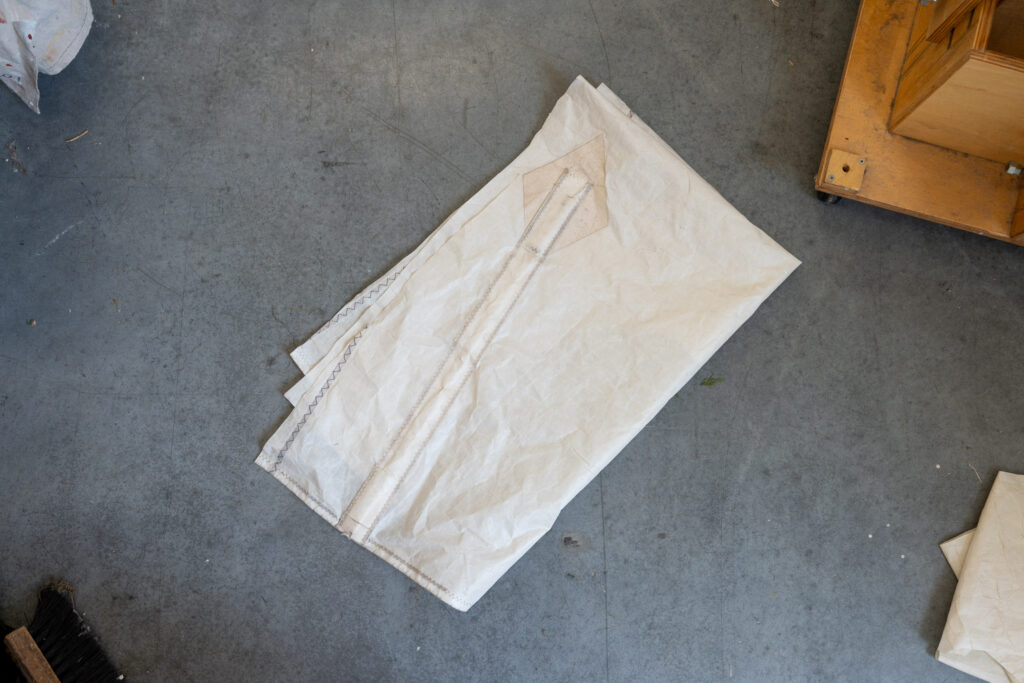
A retired/waste sail was used for the material.

Pattern was quickly and roughly drafted in CLO.
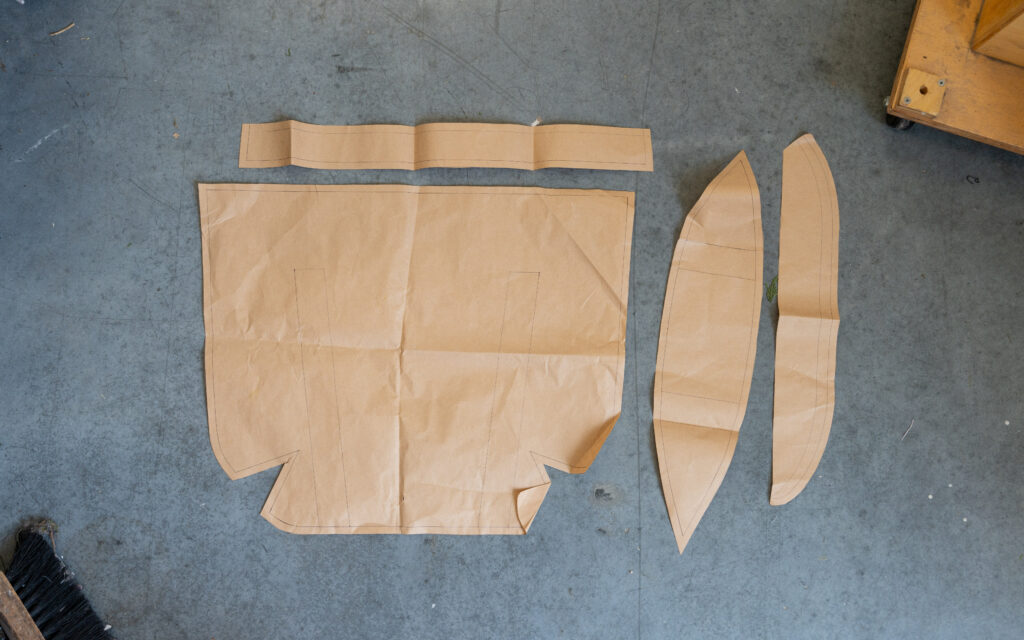
Then plotted on paper and further refined.
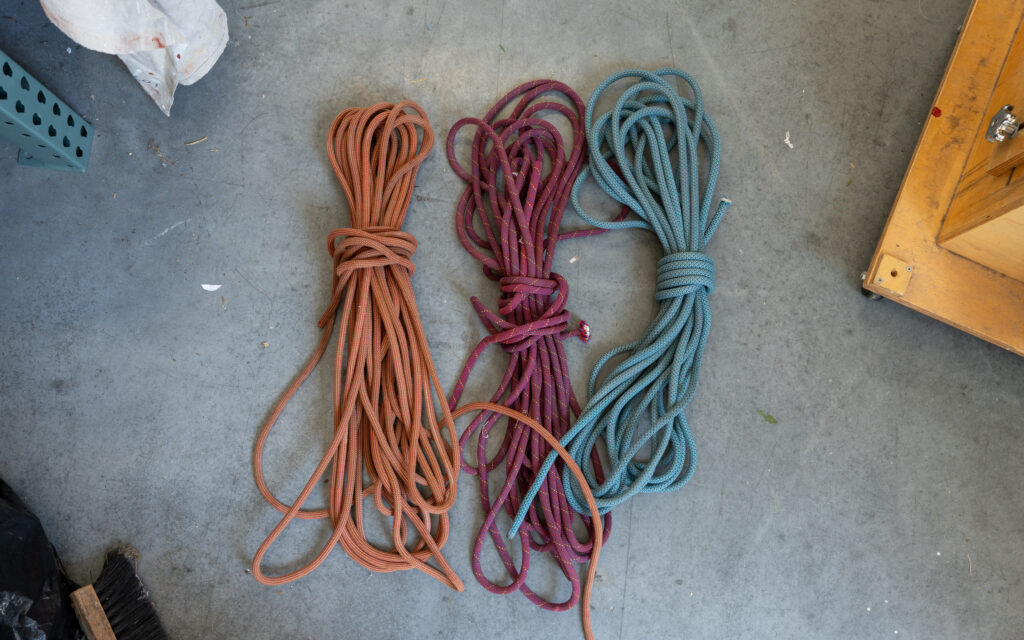
Retired climbing rope used for the handle, it is knotted in a way to allow for the adjustment in length of the straps, converting from hand to shoulder use.
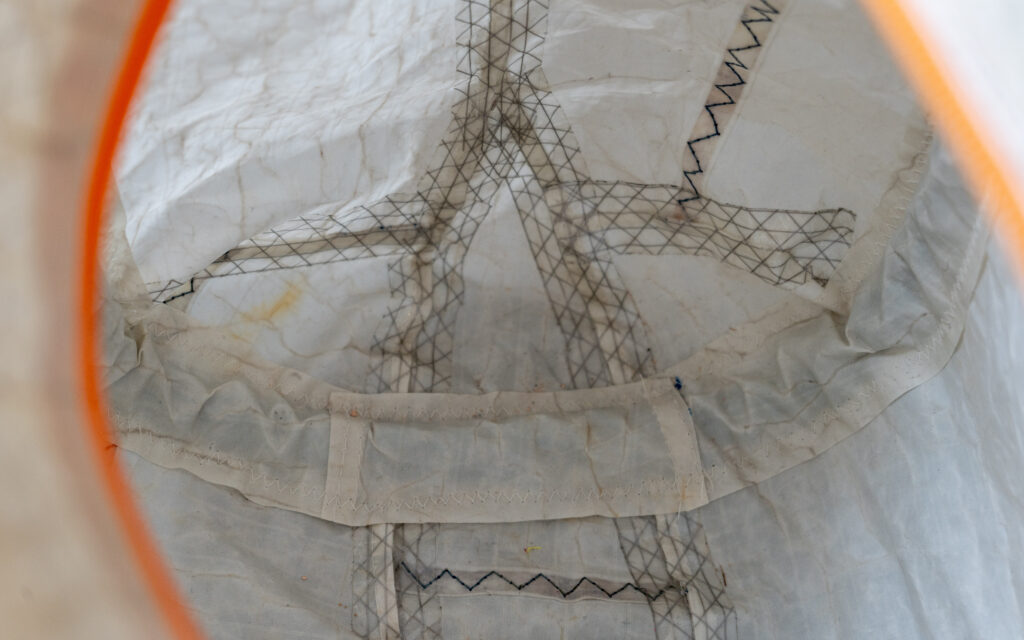
Construction was inspired by sailmaking techniques as well as outdoor equipment, including seam sealing.
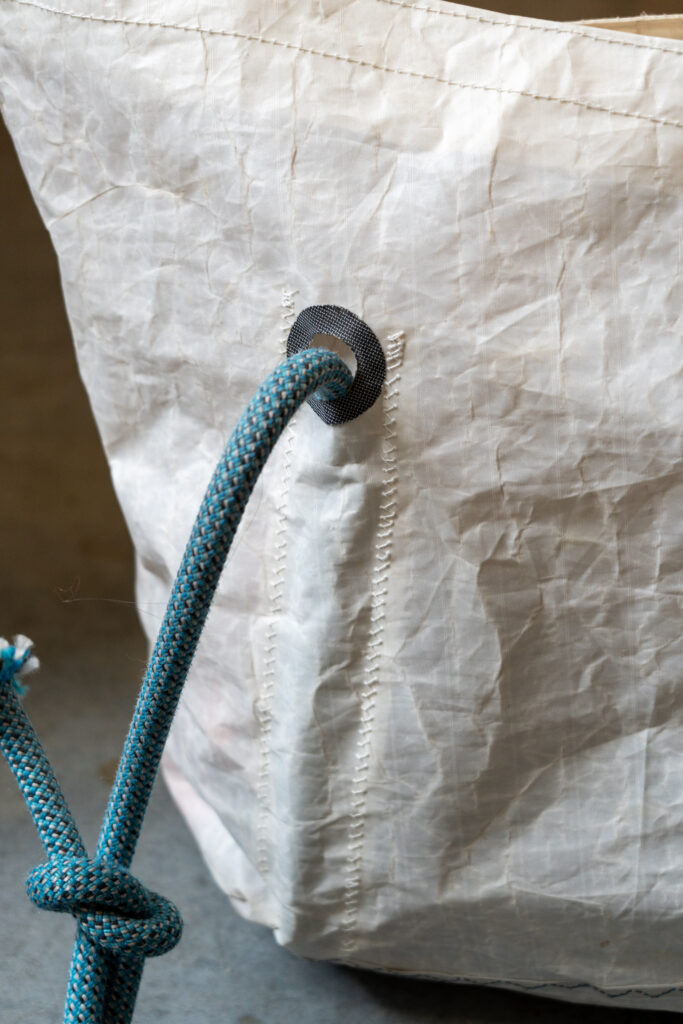
Outlet of the rope is re-enforced, similarly to how it would be on a sail.
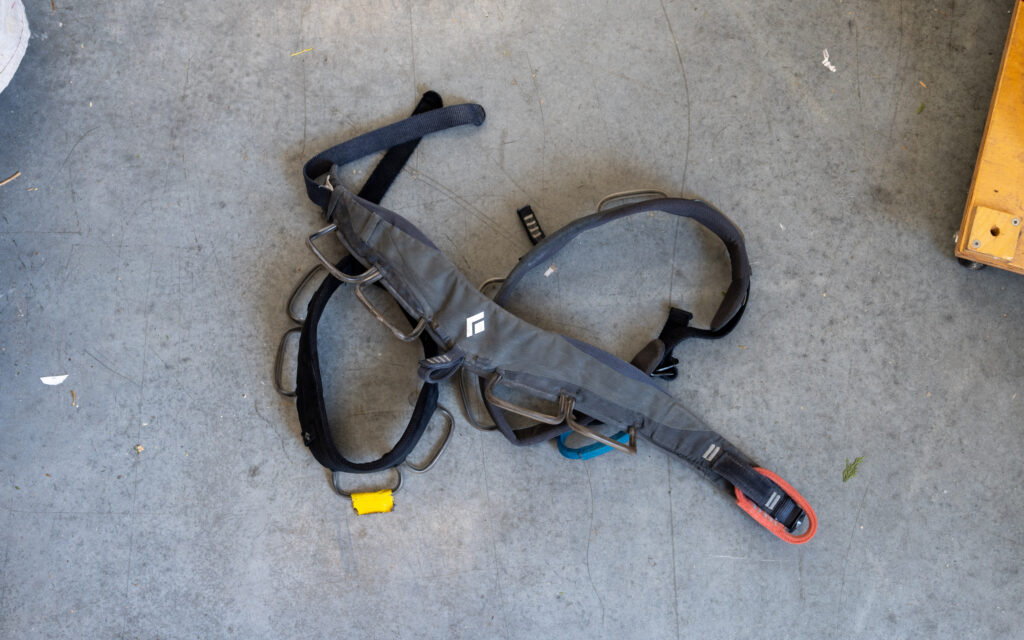
Retired/broken climbing harnesses from a local gym
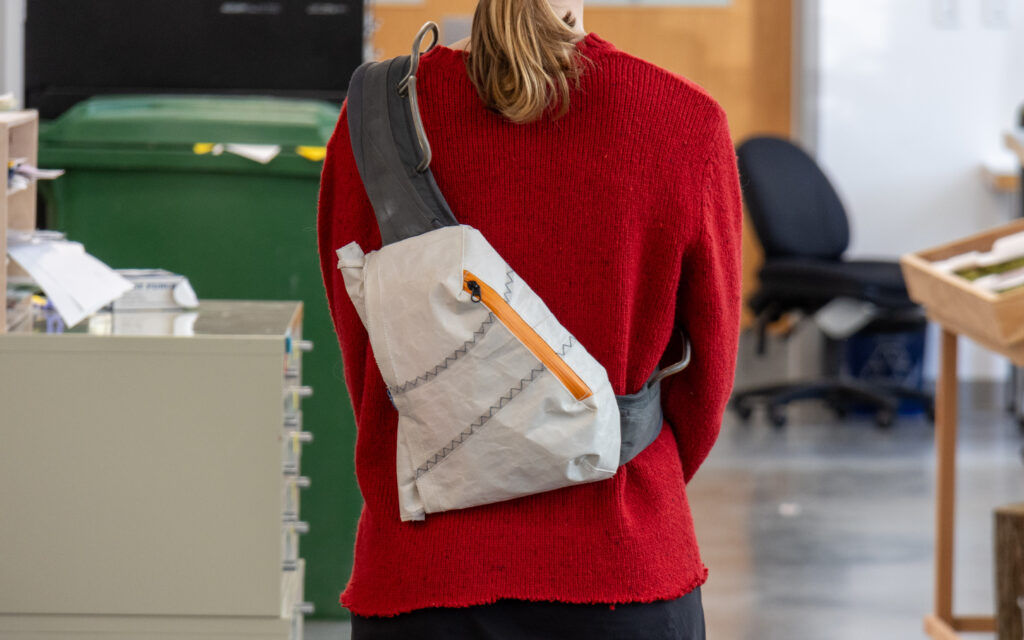
The shape and construction of the harness reminded me of some cross body bags I’m familiar with and inspired me to make this bag, with the same process and many of the same techniques as the tote bag.
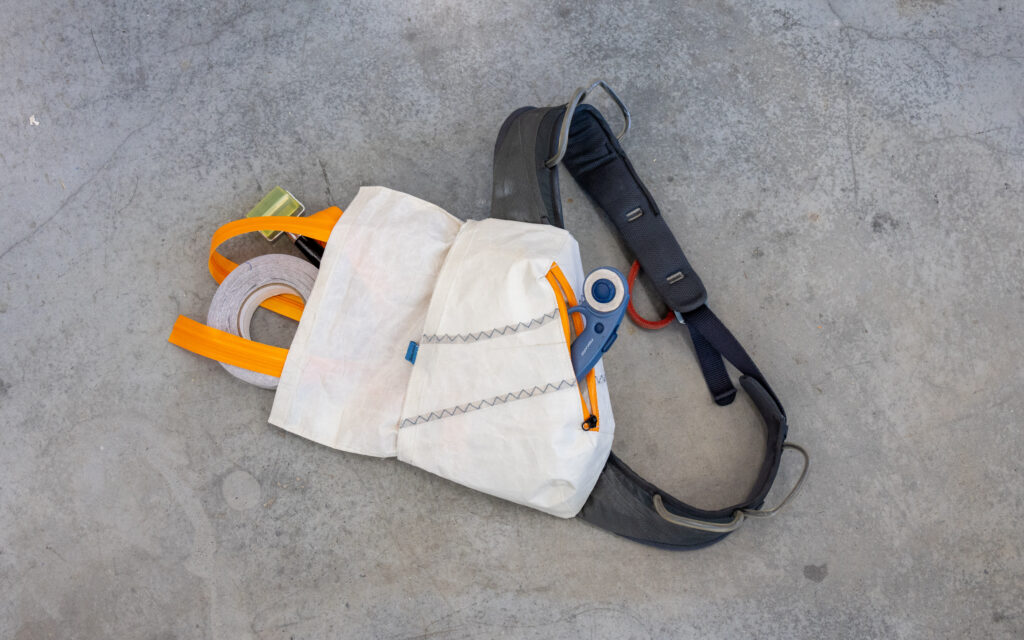
Cross Body Bag.
Material Exploration
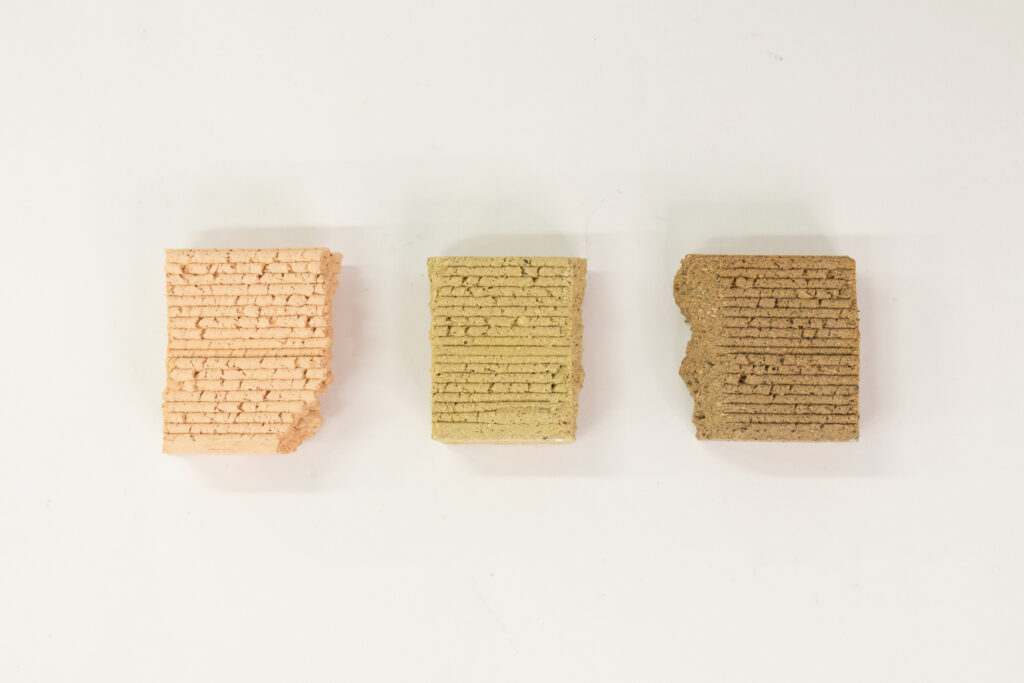
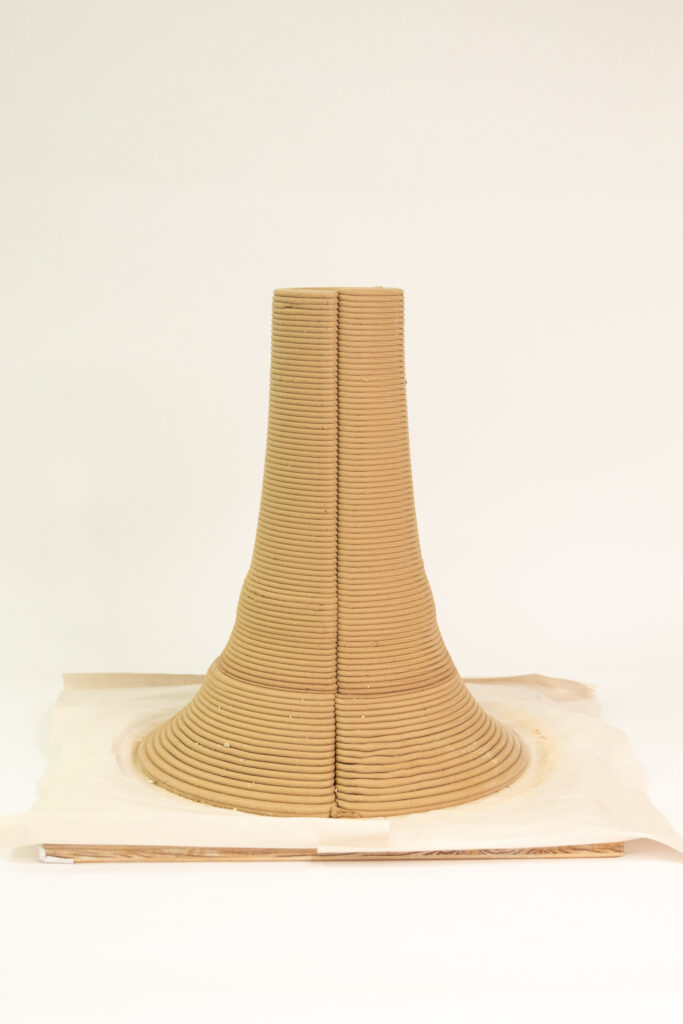
3D printed ceramics with ground post consumer ceramics as a grog. Fired to ▵05, ▵6, and ▵10
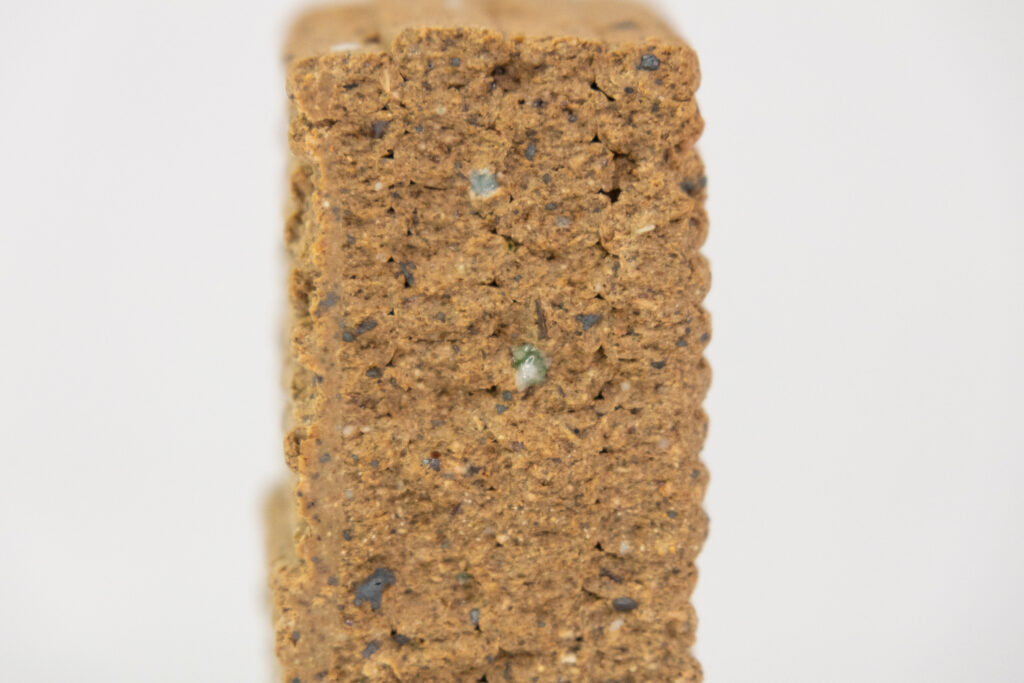
Detail of melted glaze within a peice

Process of grinding waste ceramics into sand that then can be added to clay and 3D printed. As this is glazed ceramic, this would be dangerous to throw with the potential the pieces are sharp. Once fired they dull as they re-melt.
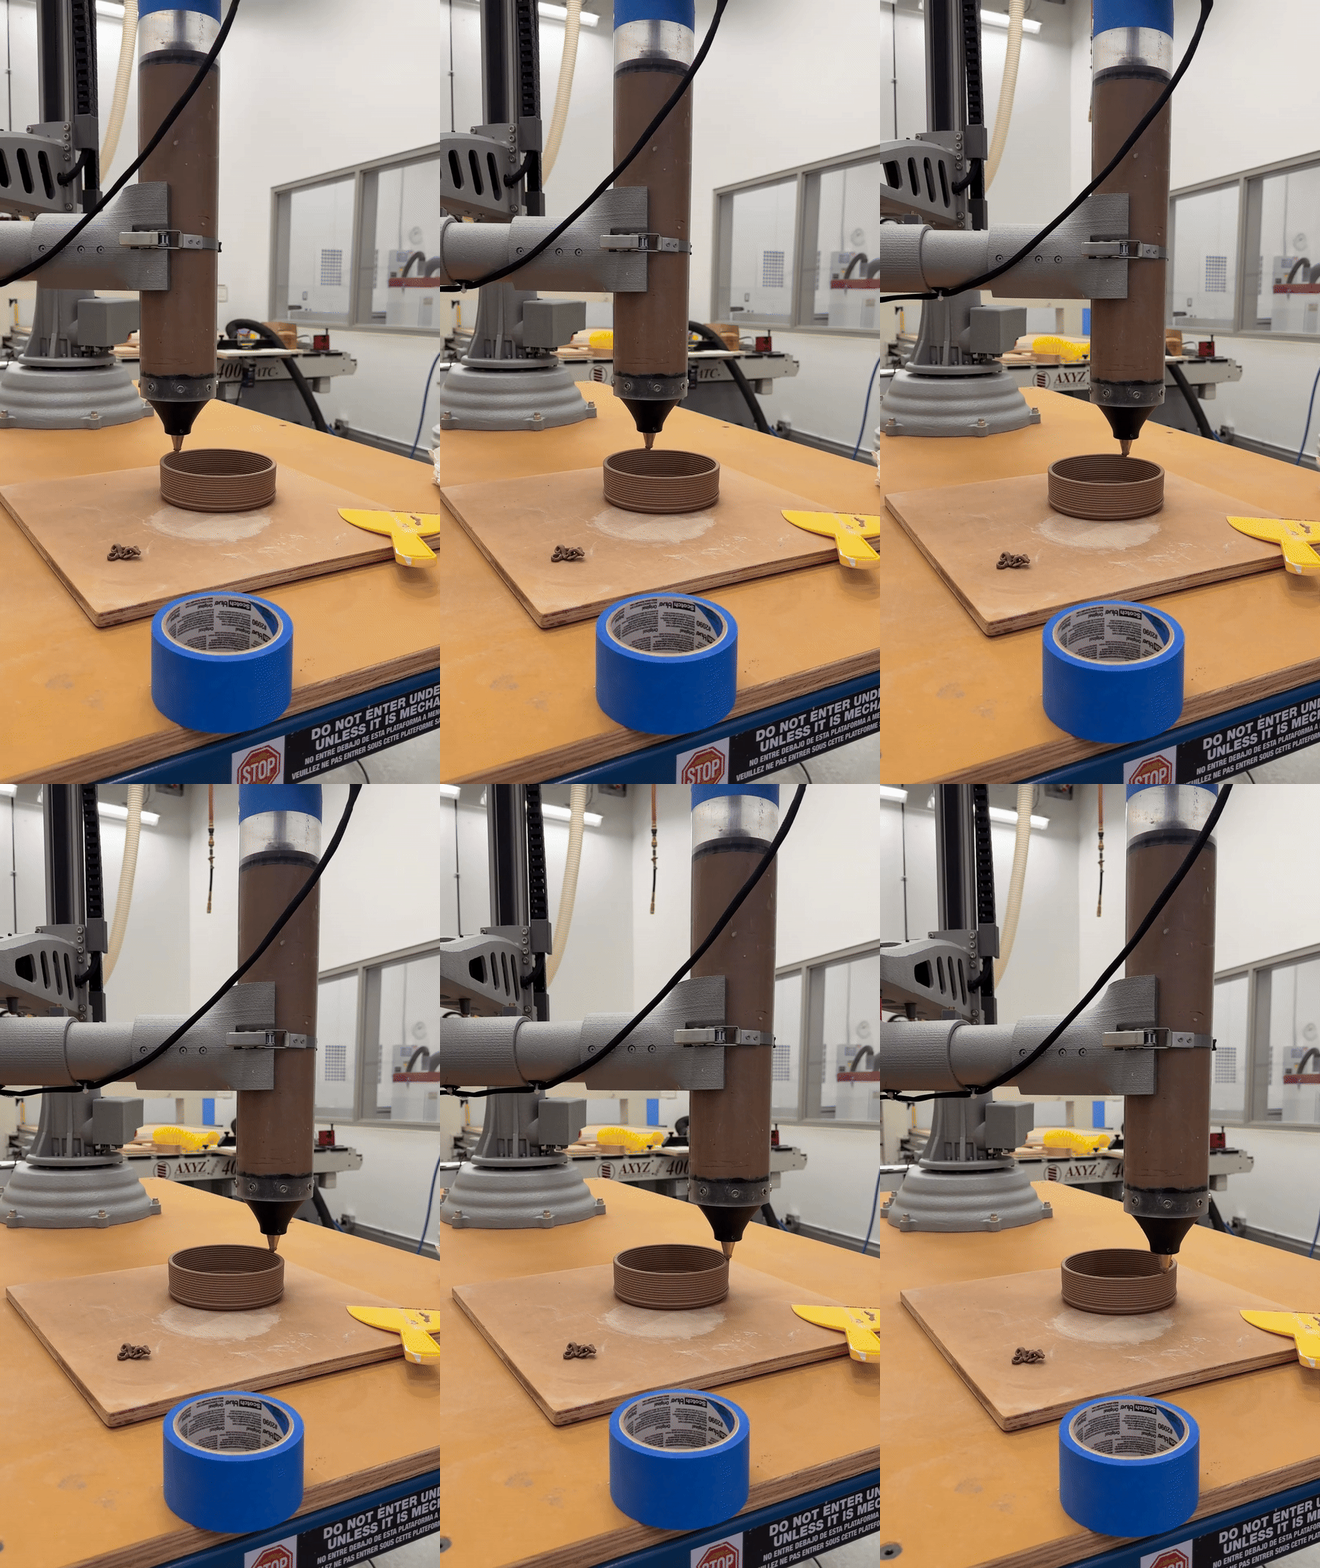
Ceramic 3D printing test.
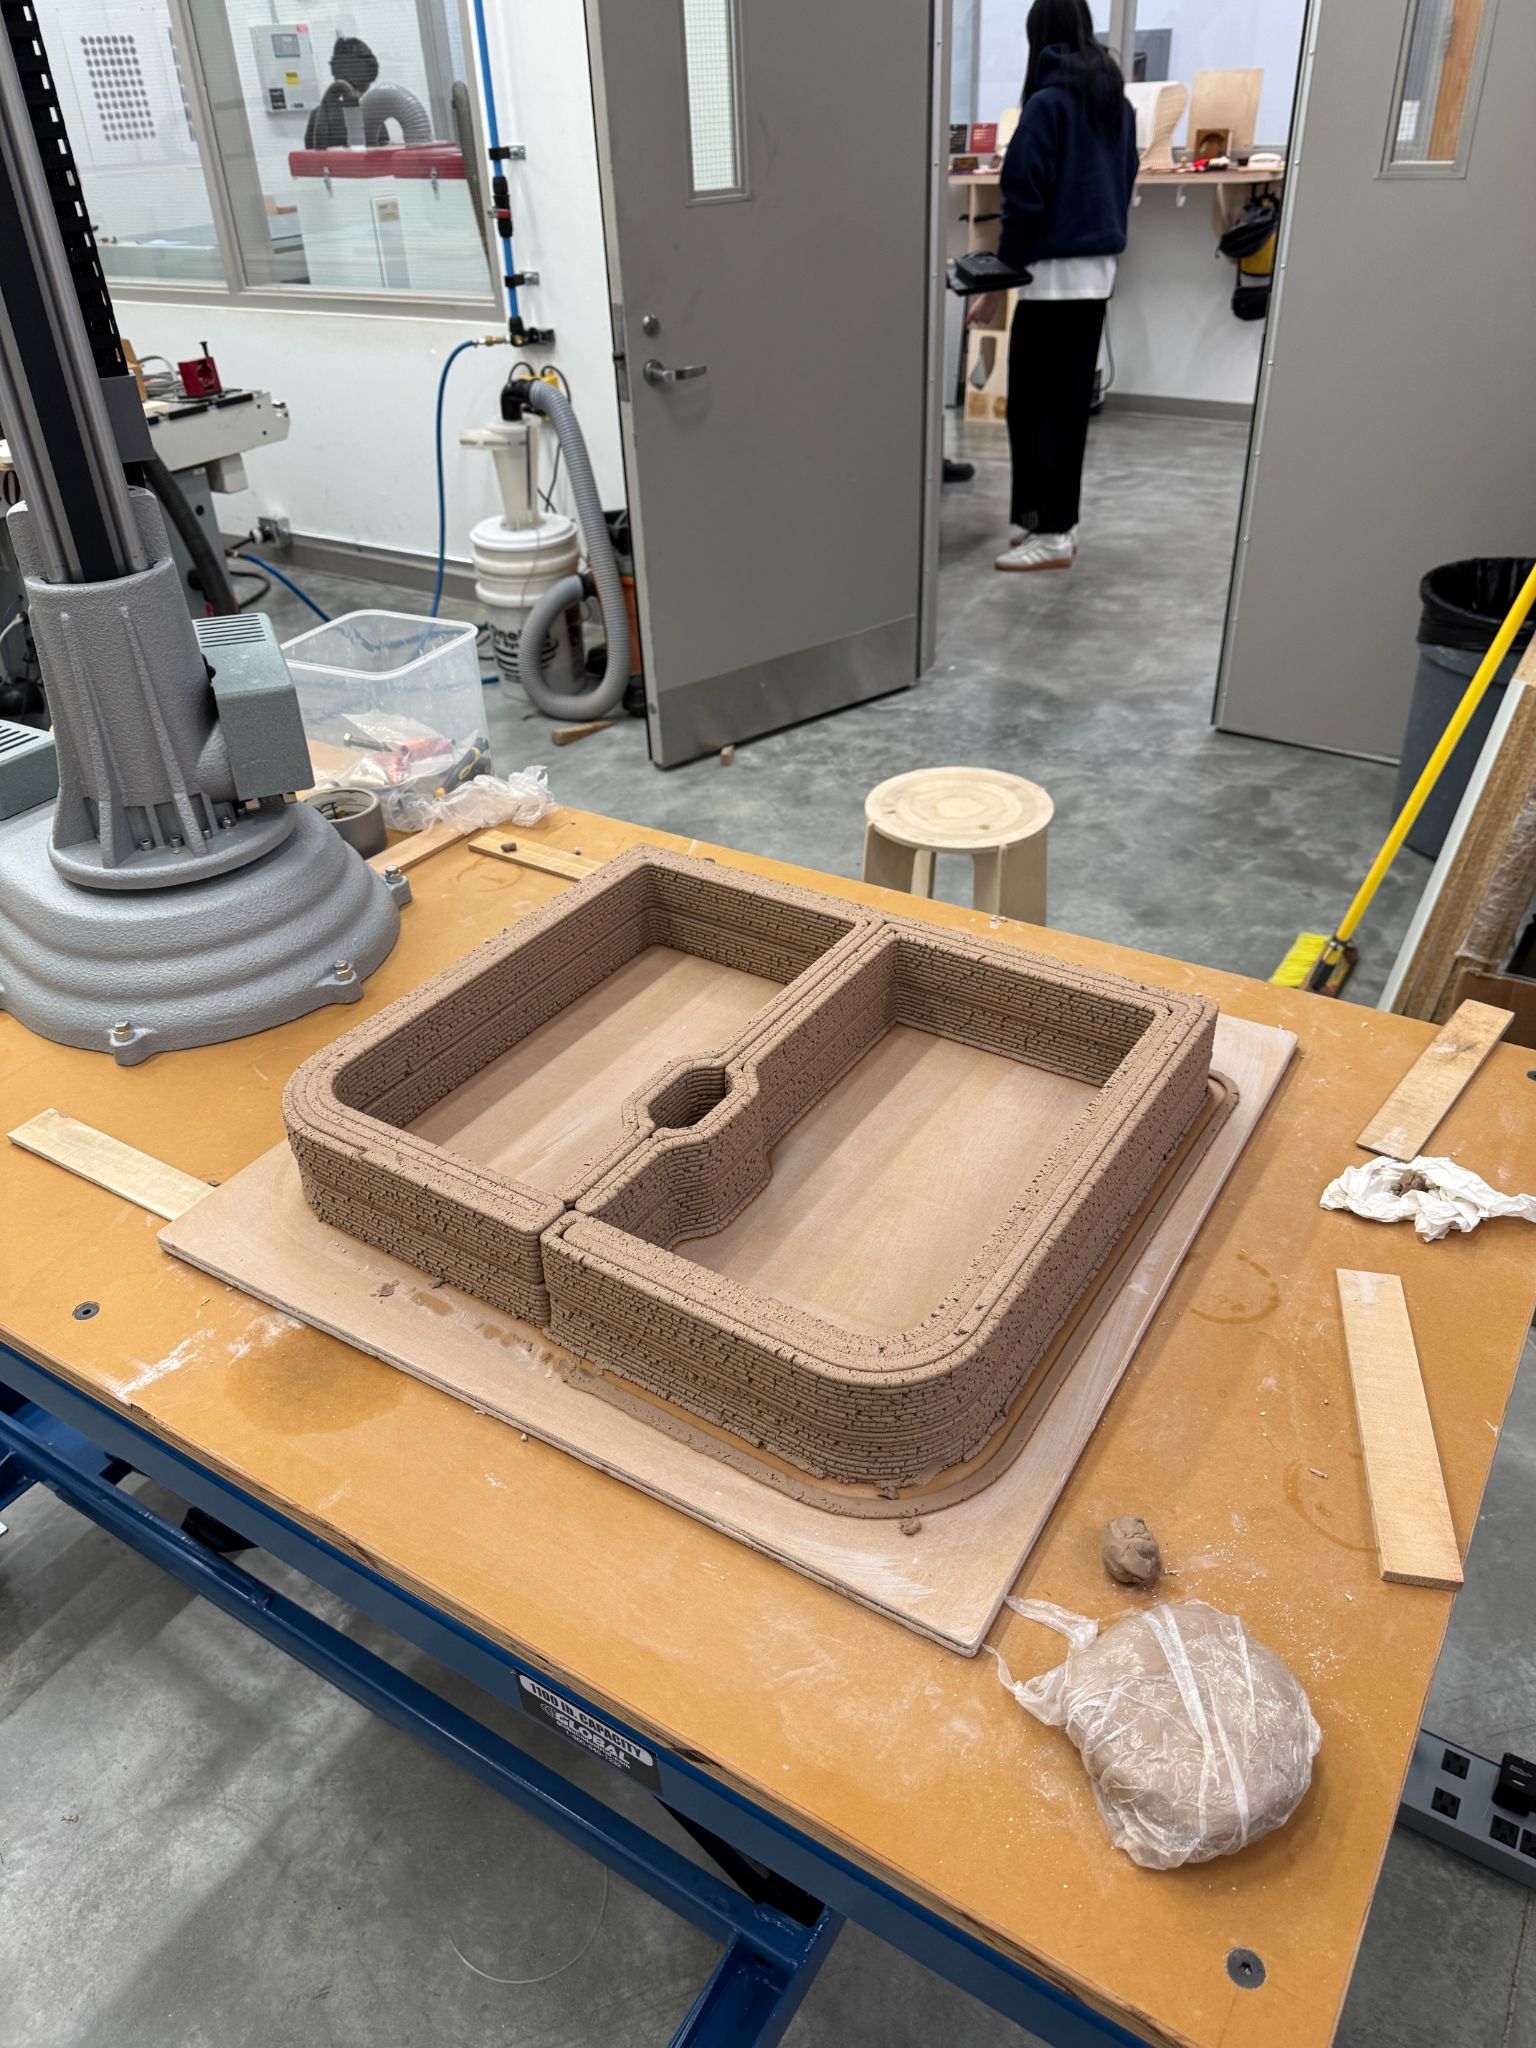
First large-scale test. this was the side of a bench, but unfortunately cracked while drying.
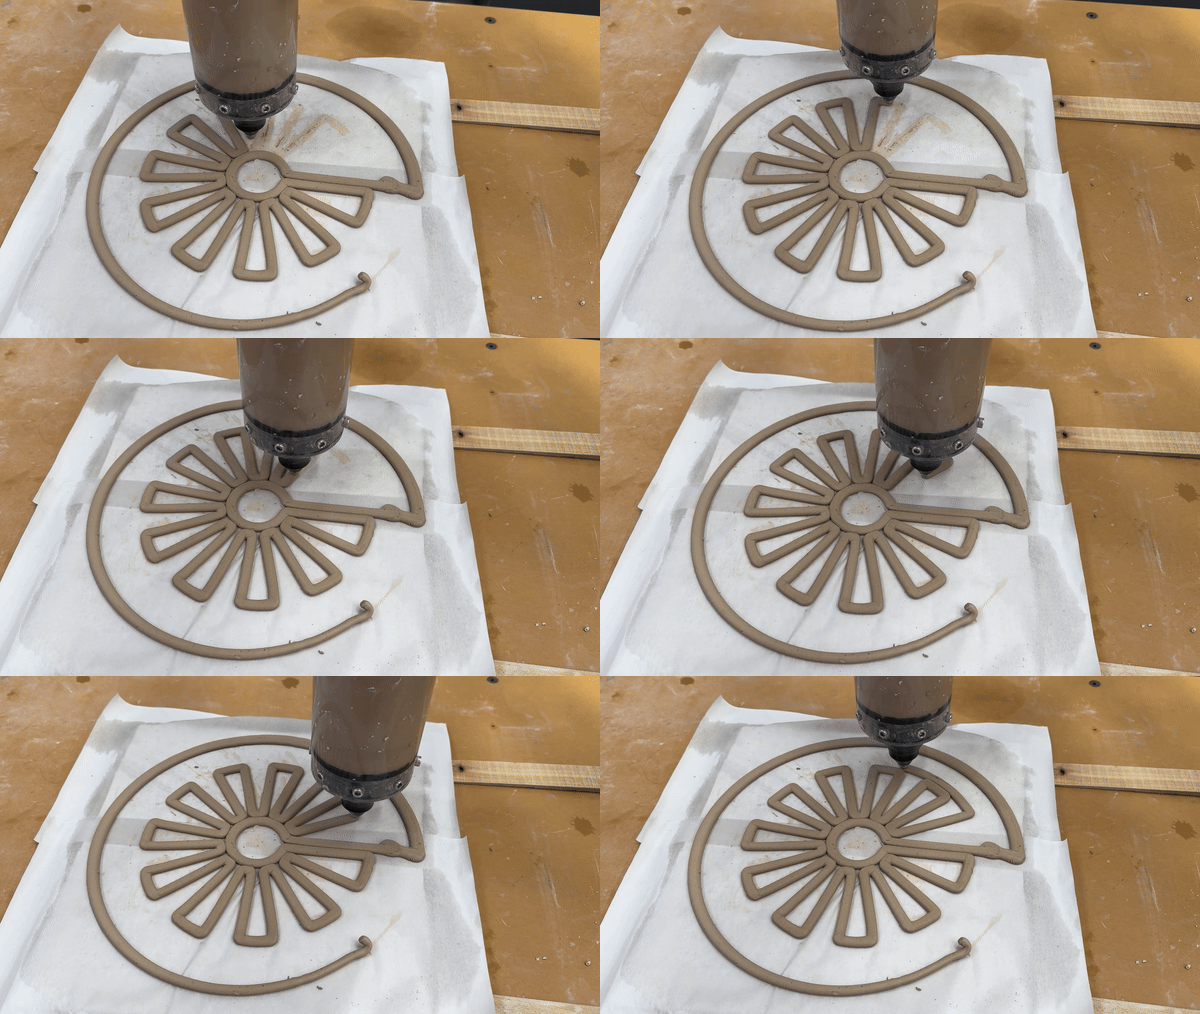
Due to the type of ceramic printer, the whole object needs to be printed in one continuous line. Files have to be very carefully designed to include internal supports that can be printed continuously.
The gif above printed to compleetion.
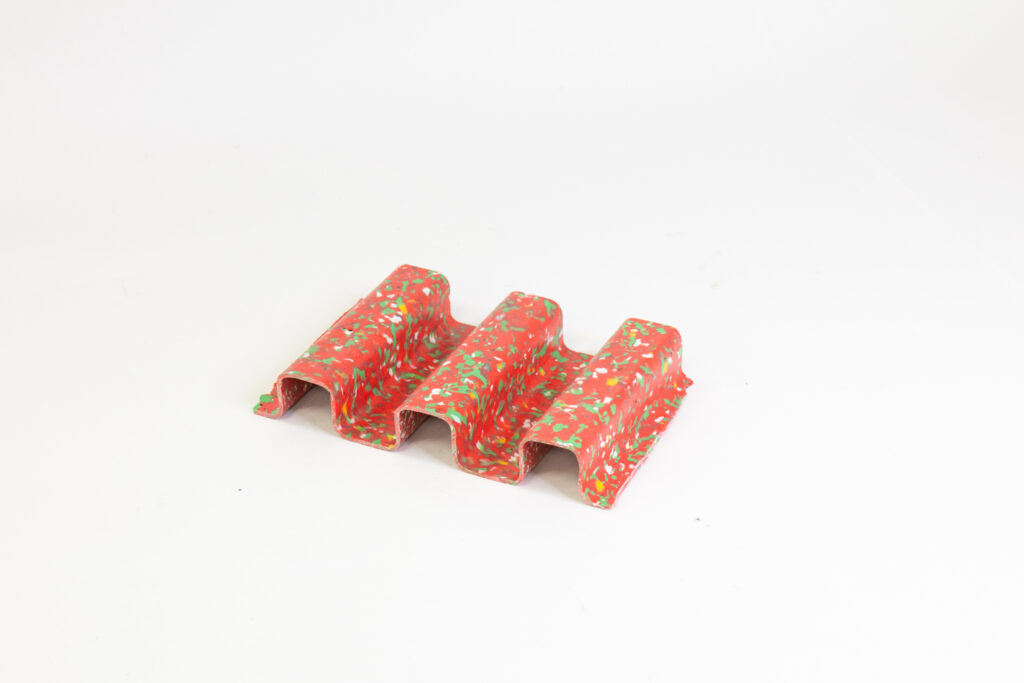
Corrugated recycled plastic test
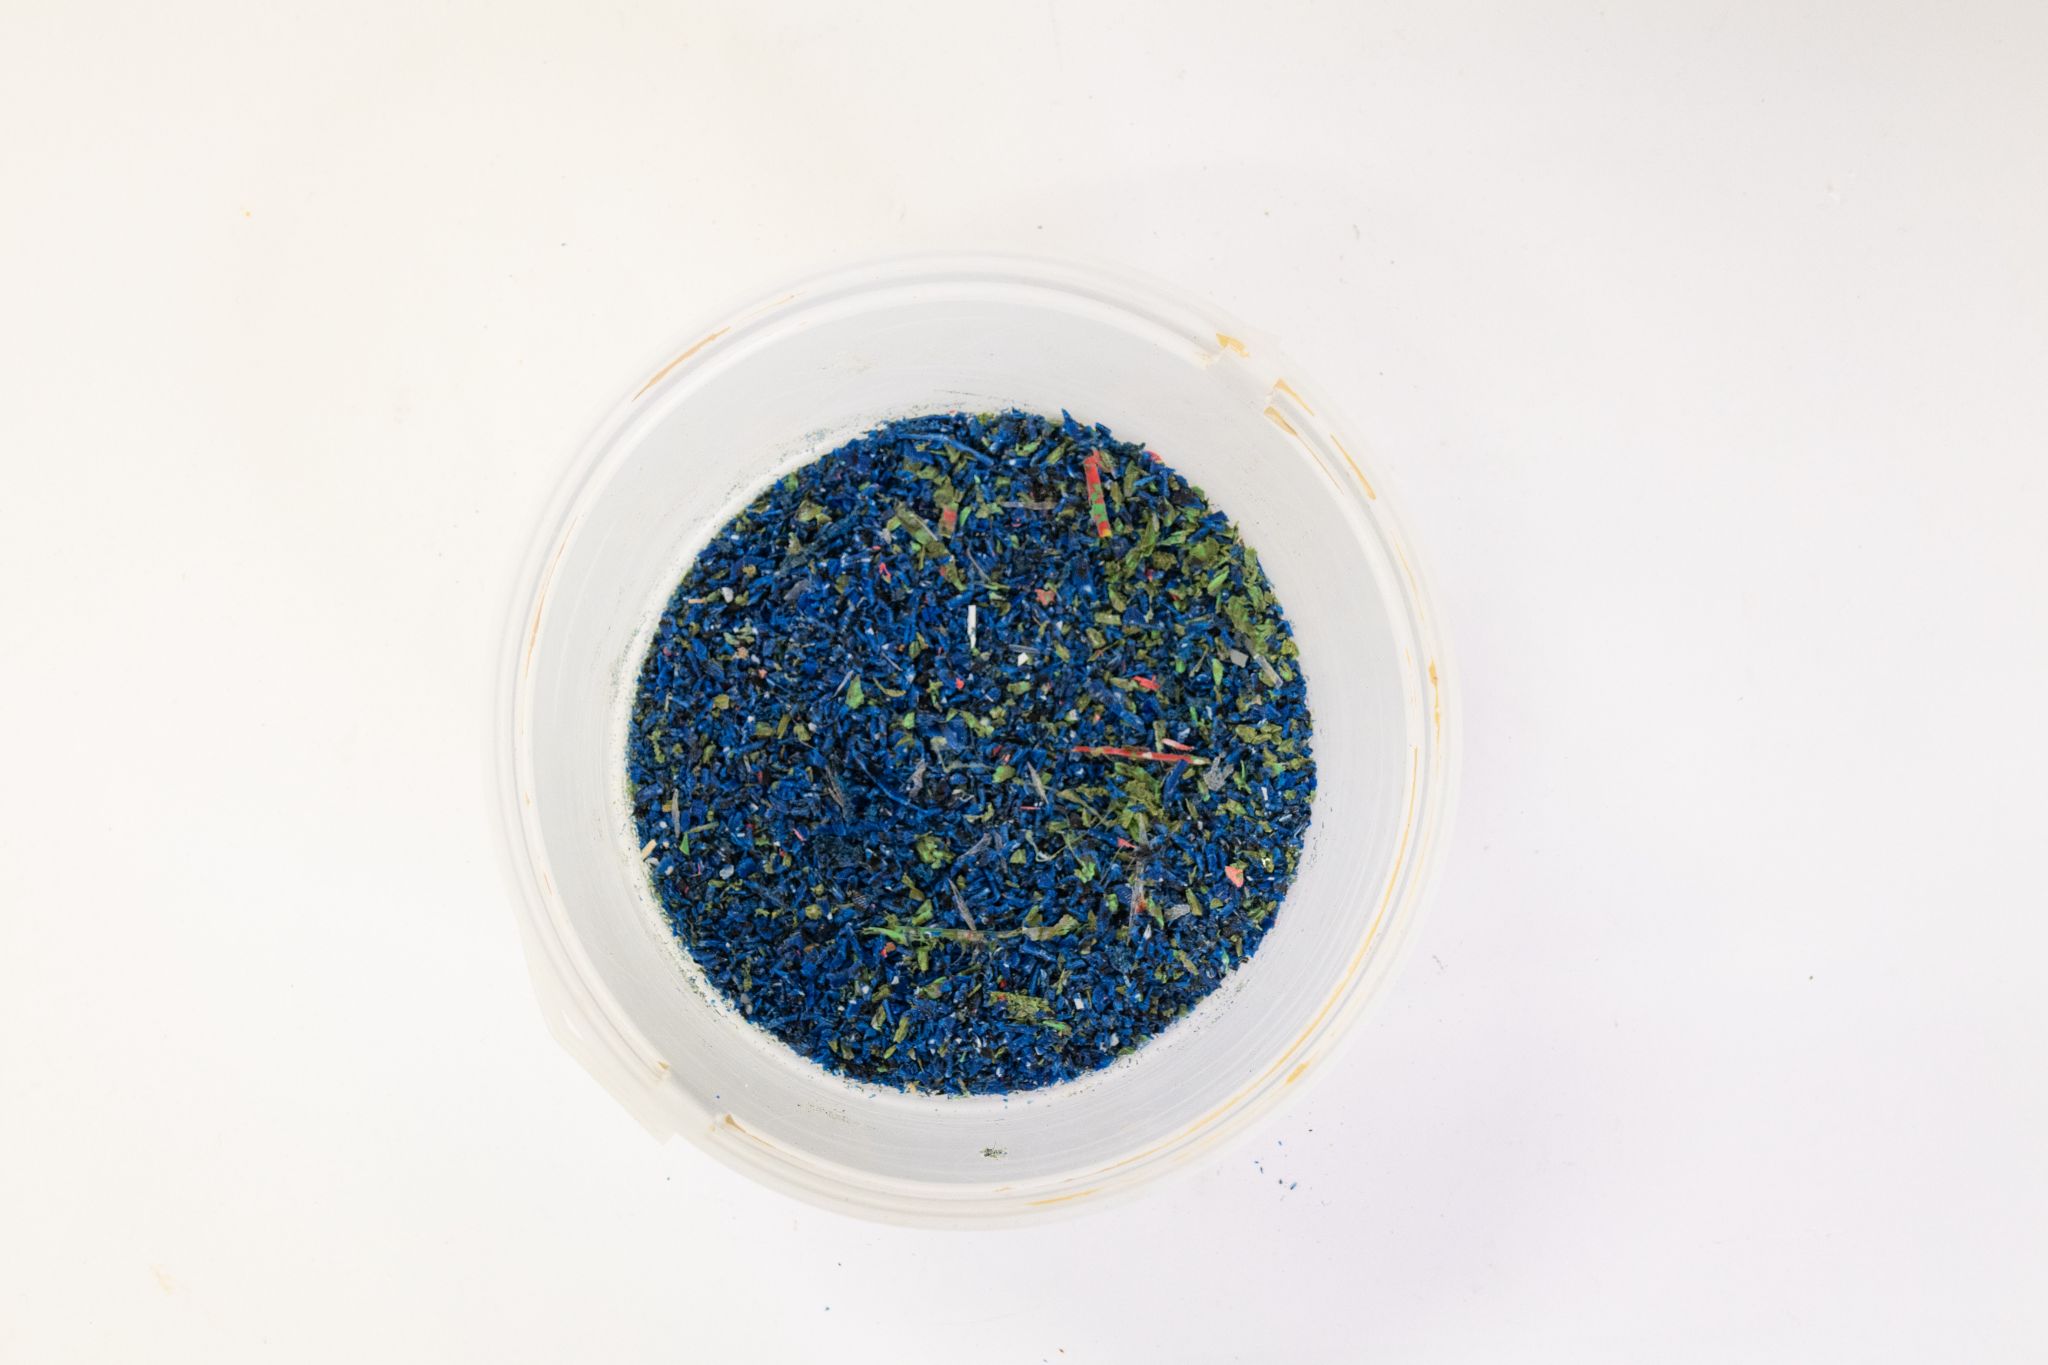
Waste 3D prints are collected and ground down. Many 3D printed plastics cannot be put in the blue bin to be recycled due to their low melting temperature.
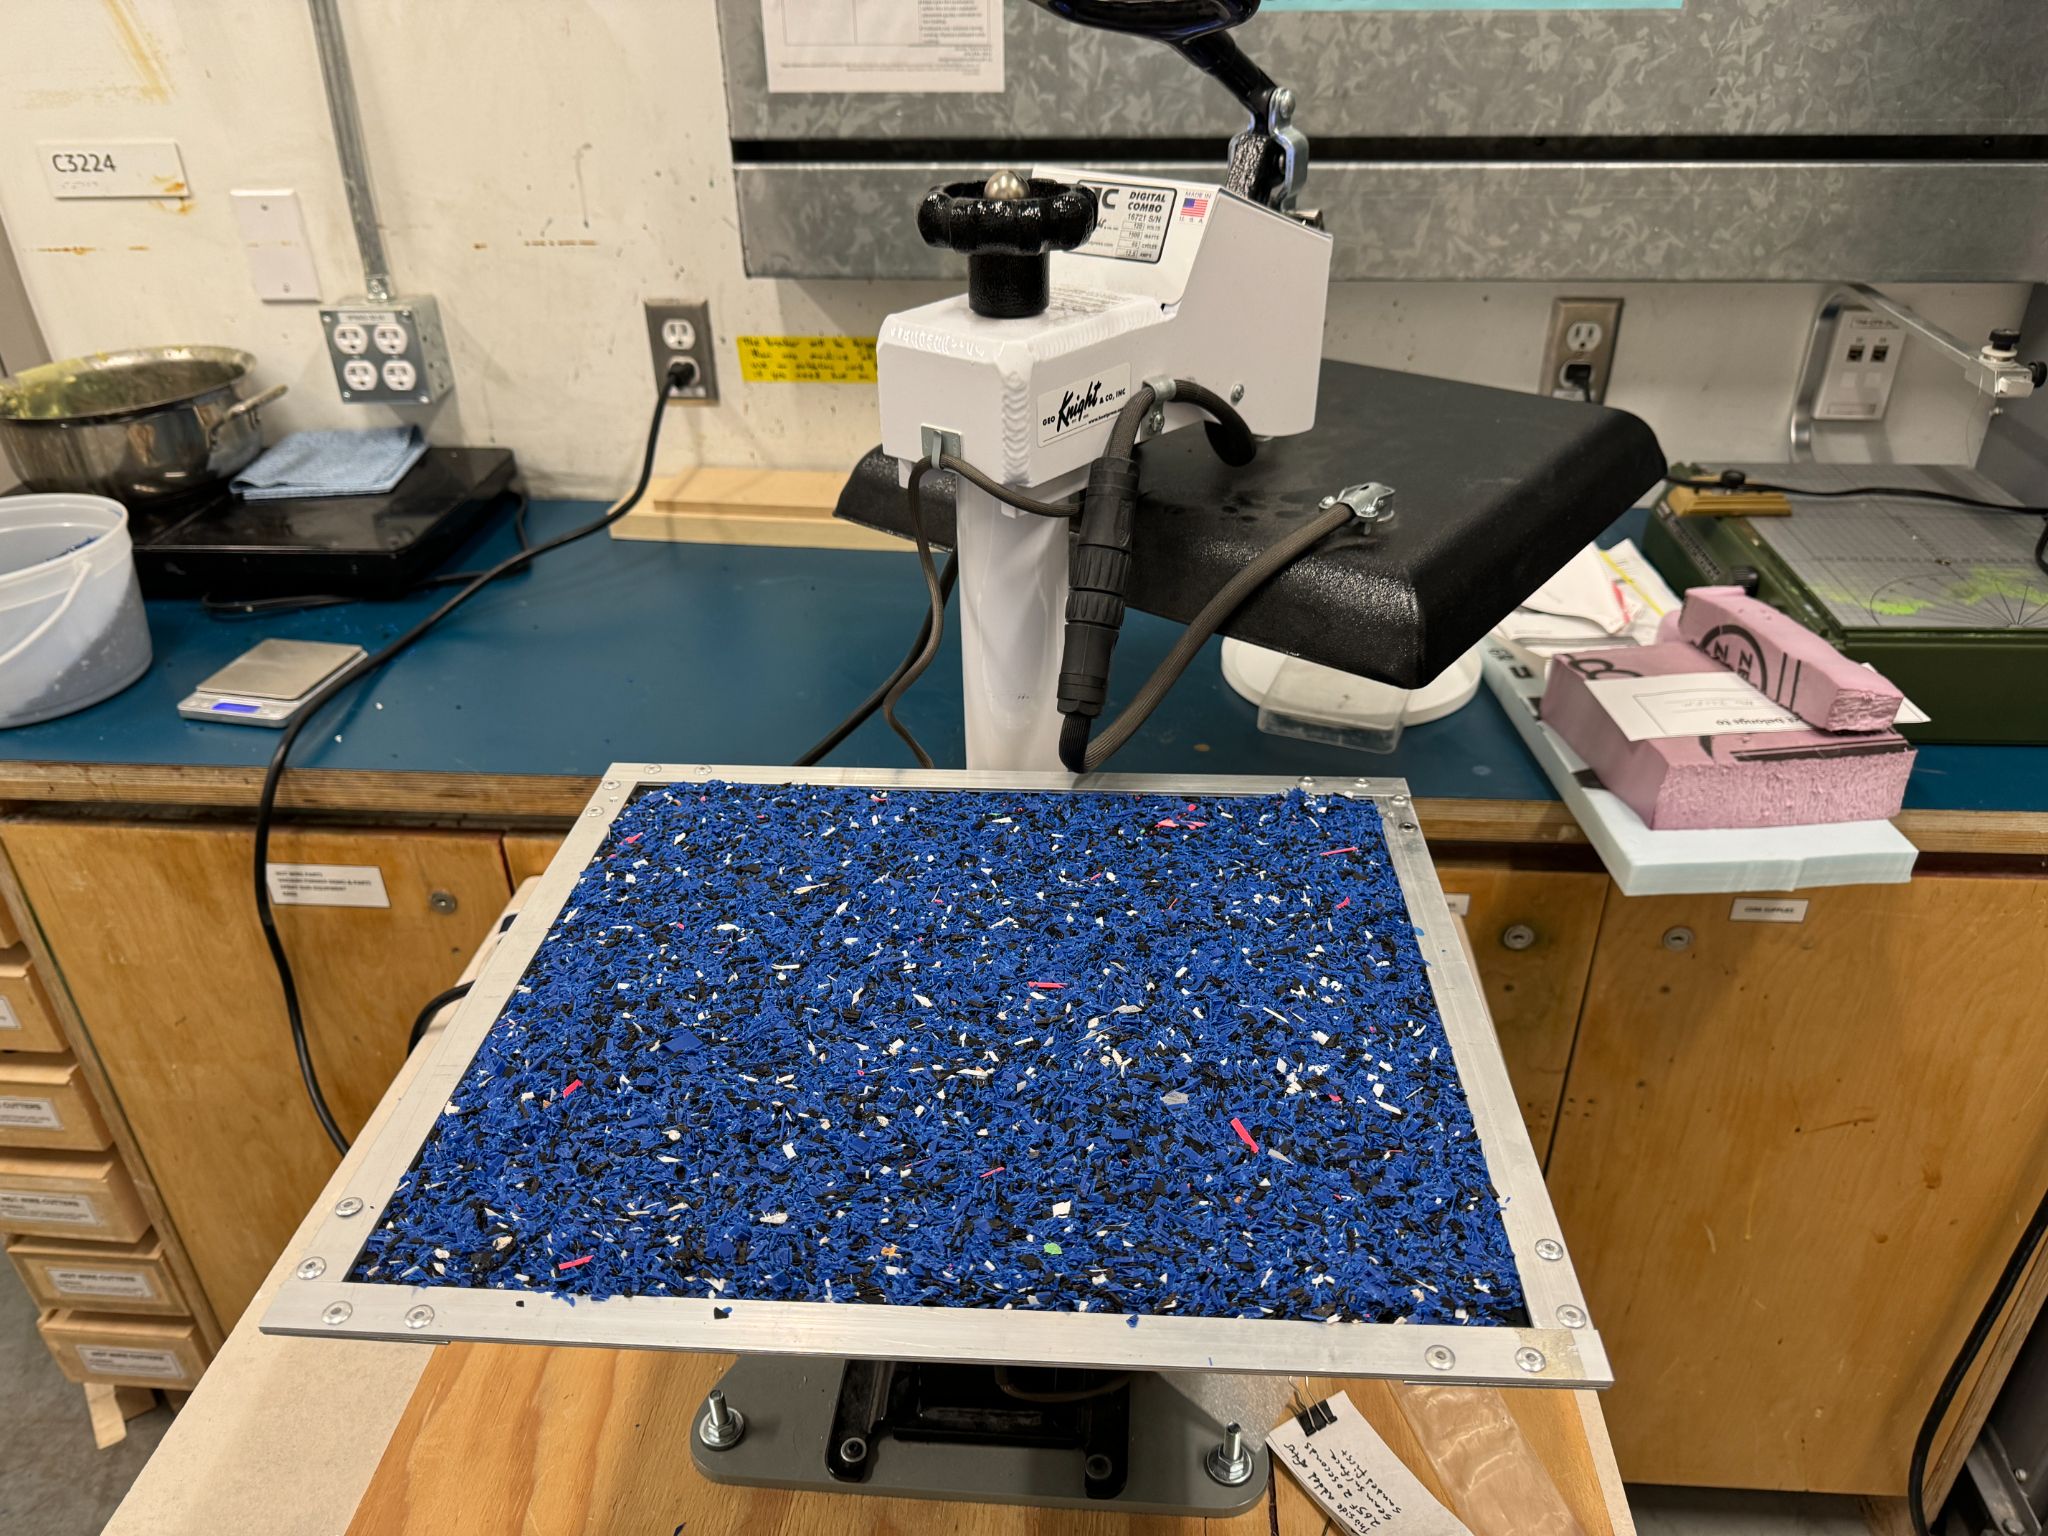
This can be an advantage to us, enabling the use of a simple t-shirt heat press to make recycled plastic sheets.

This results in some quite beautiful visual texture. You can see the difference between the top which is the side that the heat is applied from and looks swirly, and the bottom which is almost digital looking.
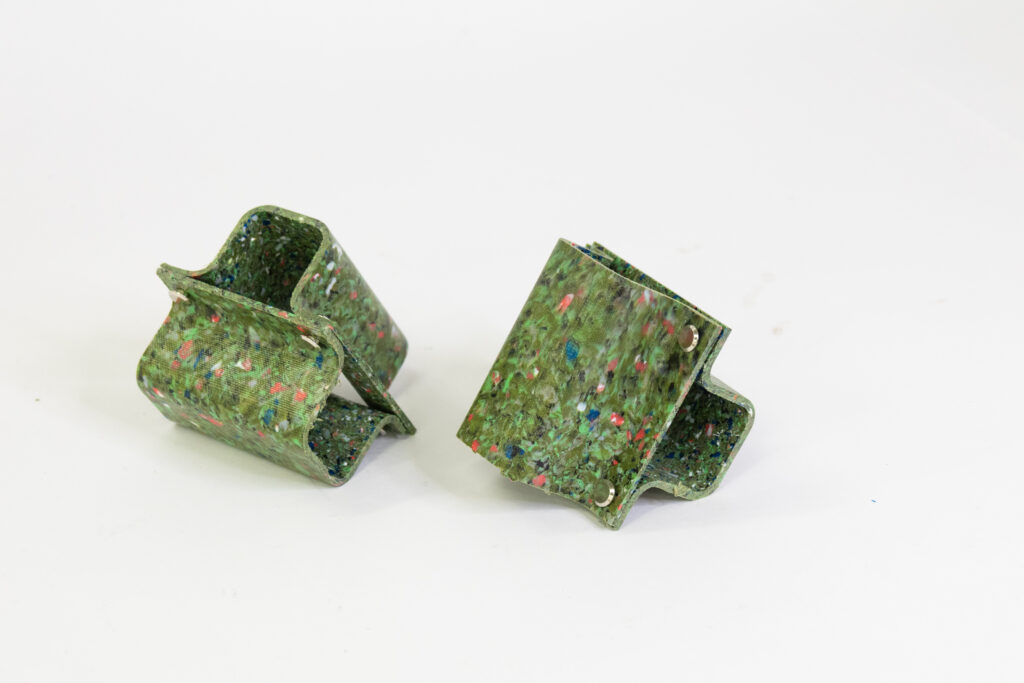
Assembly brackets made from the recycled plastic.
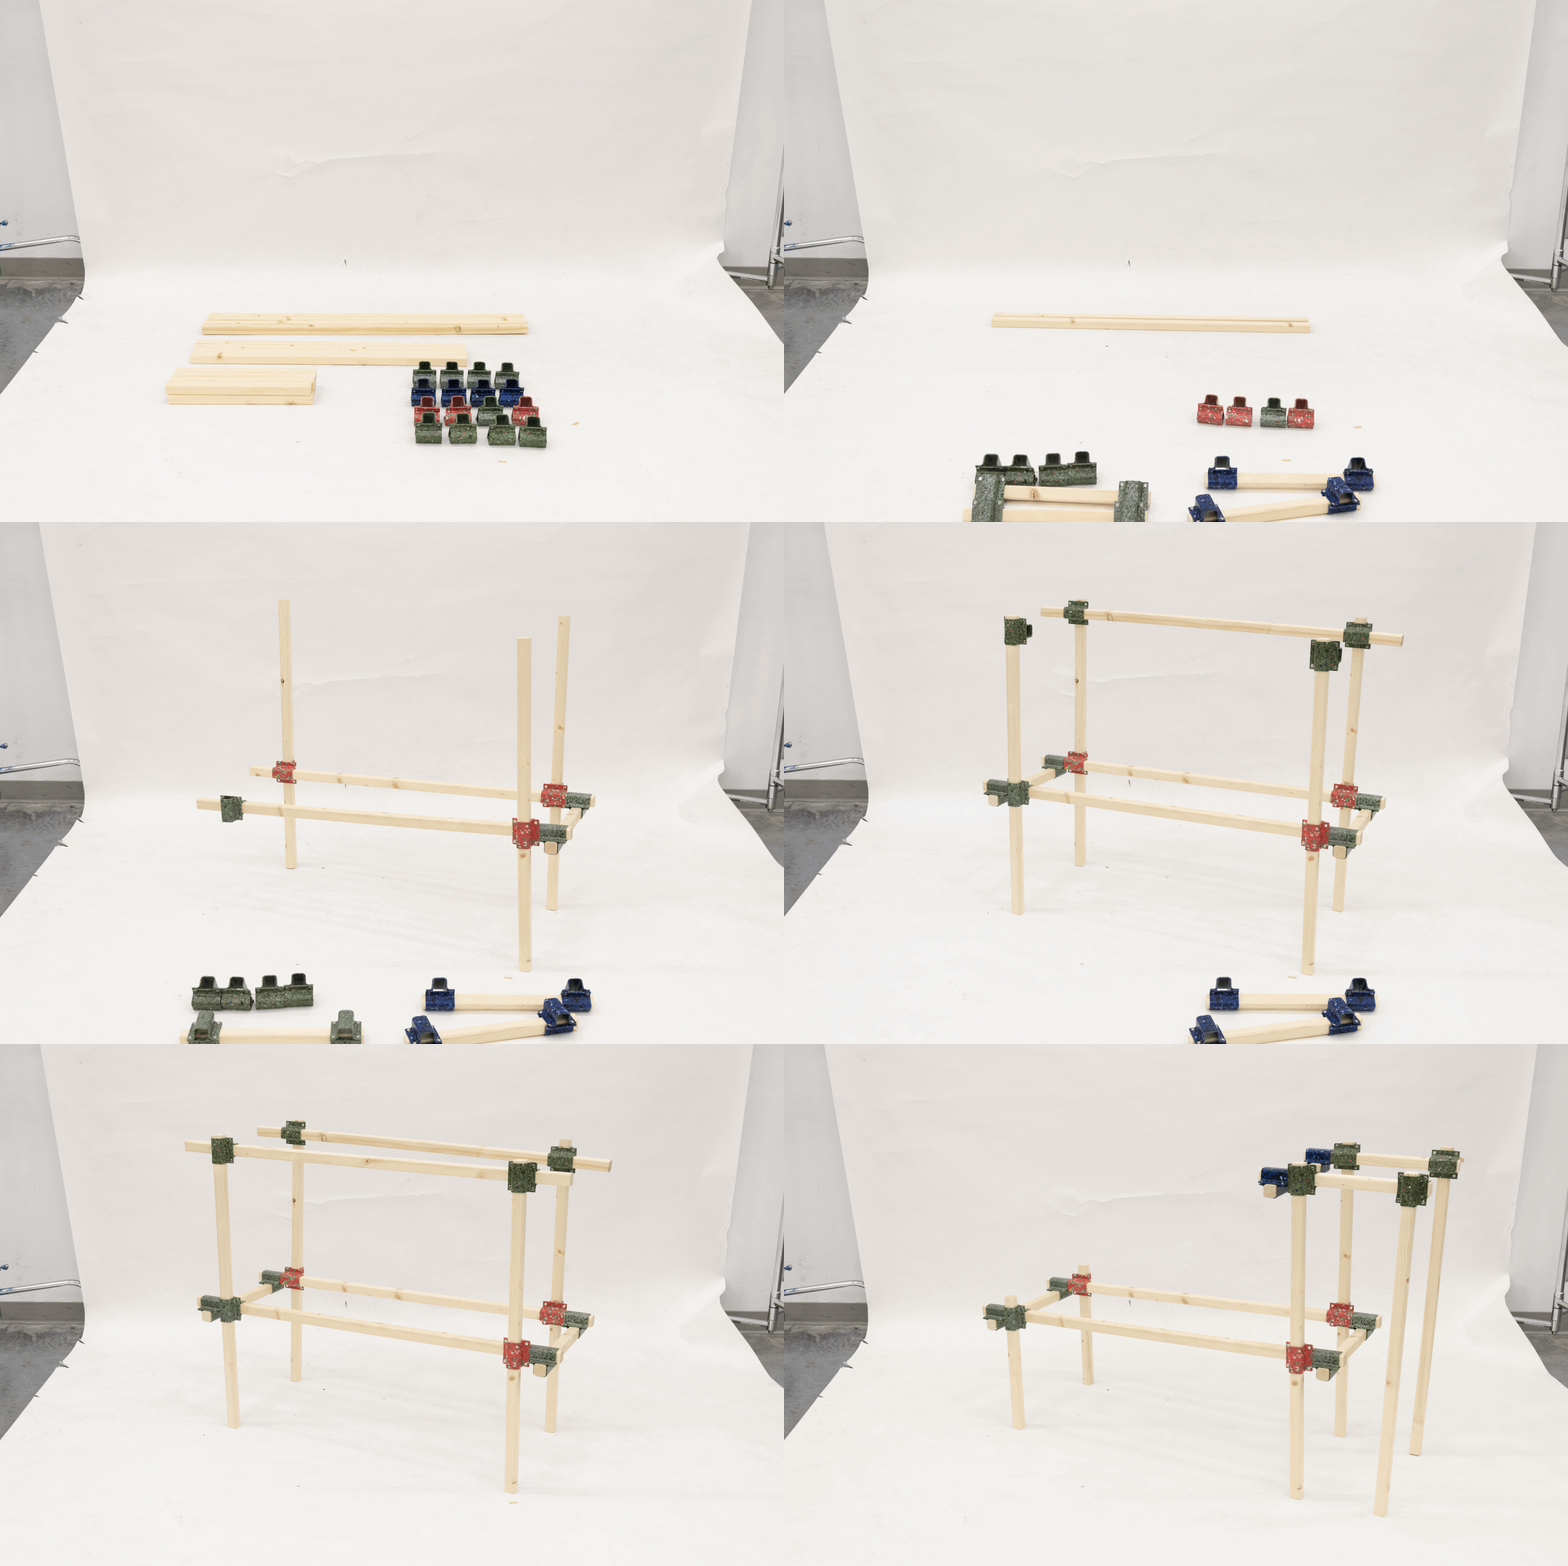
Brackets used to quickly assemble a furniture piece.
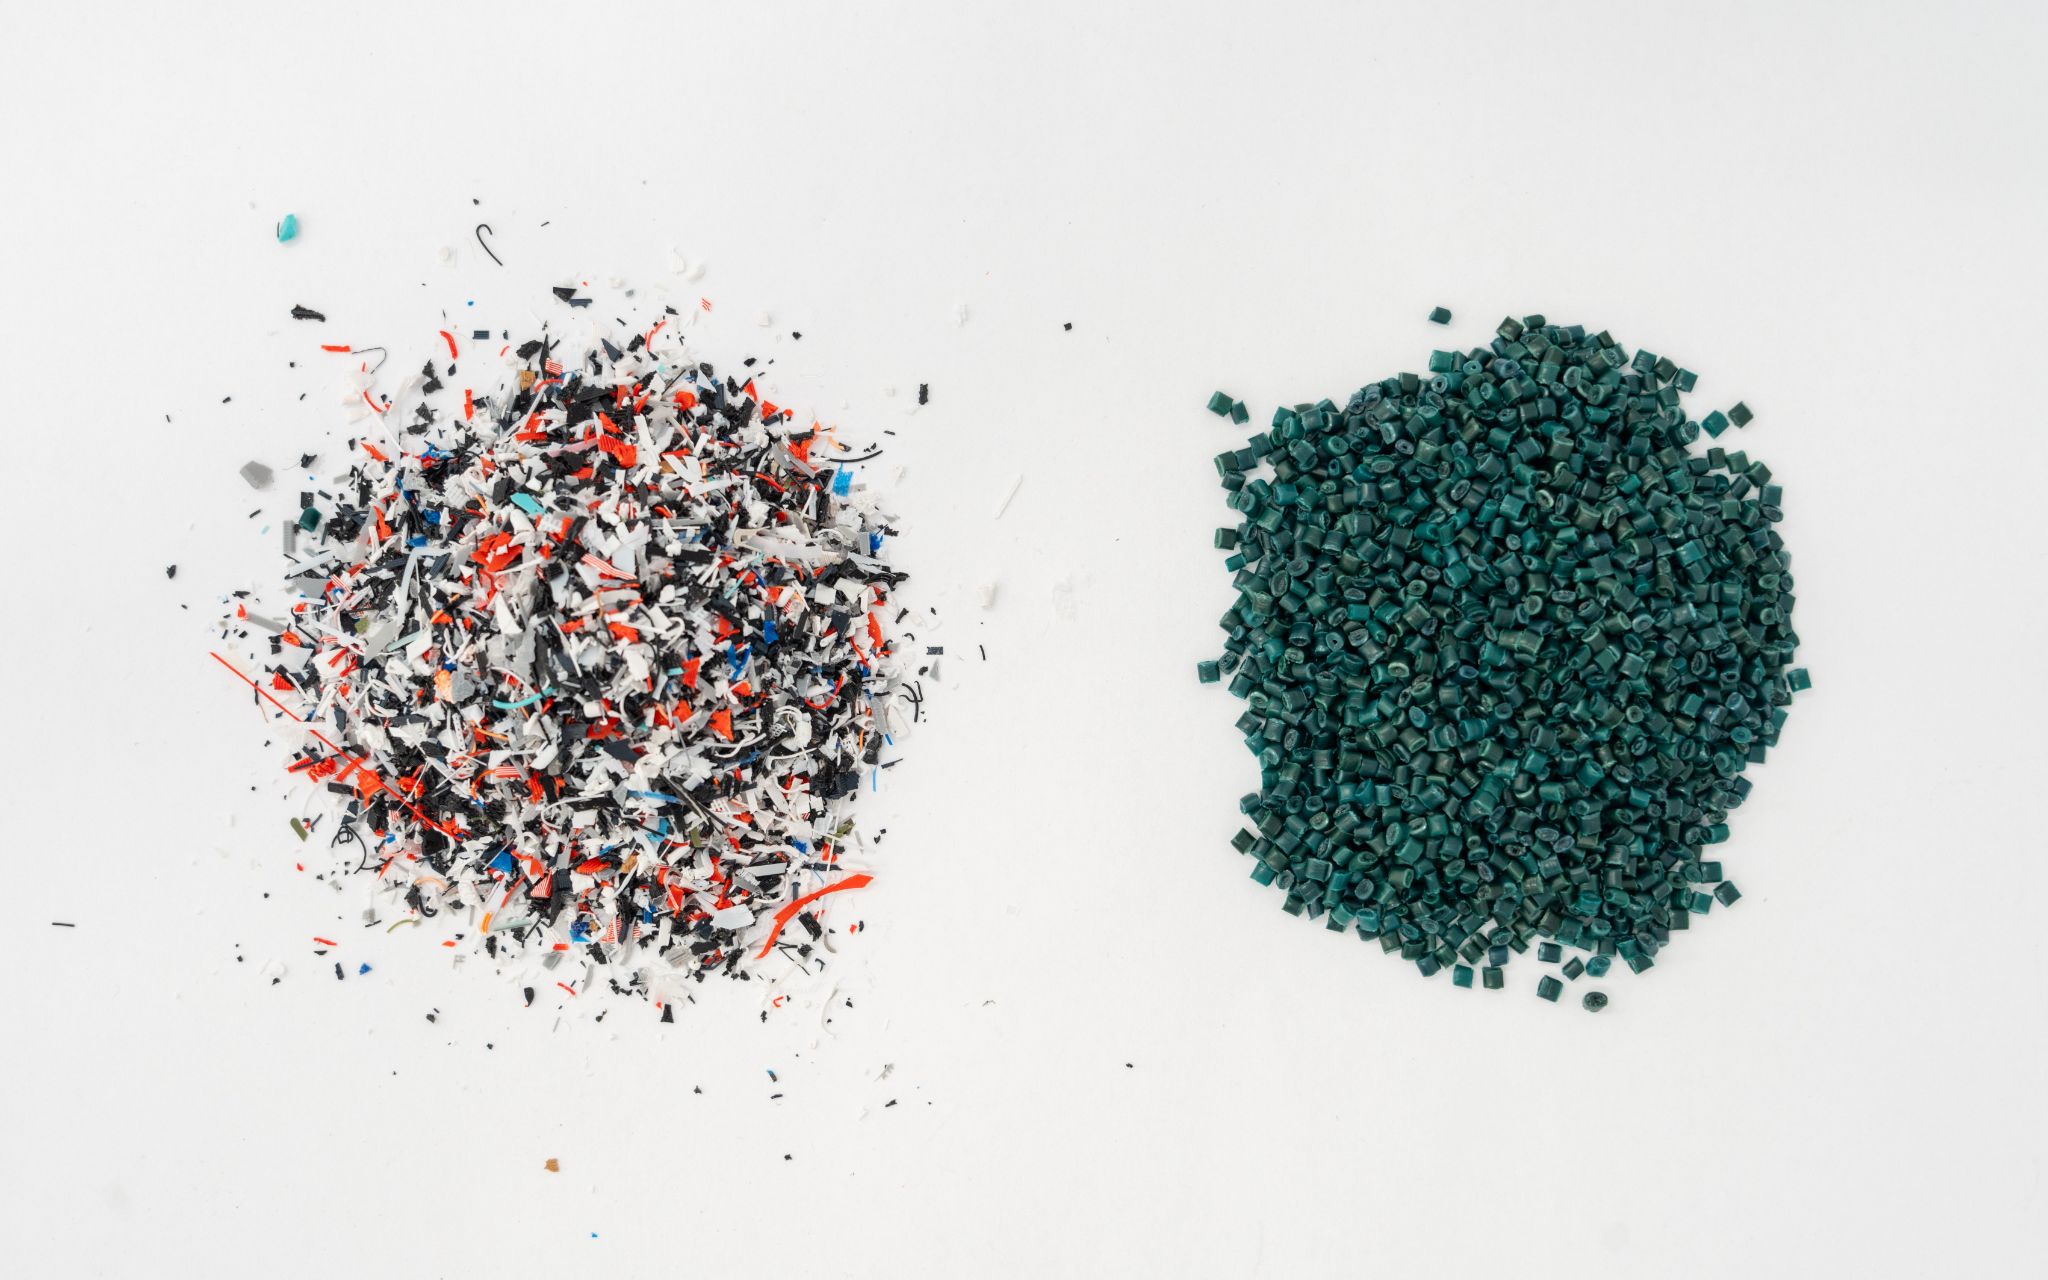
Shredded 3D prints, and Polypropylene pellets made from fishing nets pulled from the ocean. The goal of the project below is to be able to 3D print material just like this. With the goal of one day being able to shred an old or broken item and use that plastic to print its replacement.
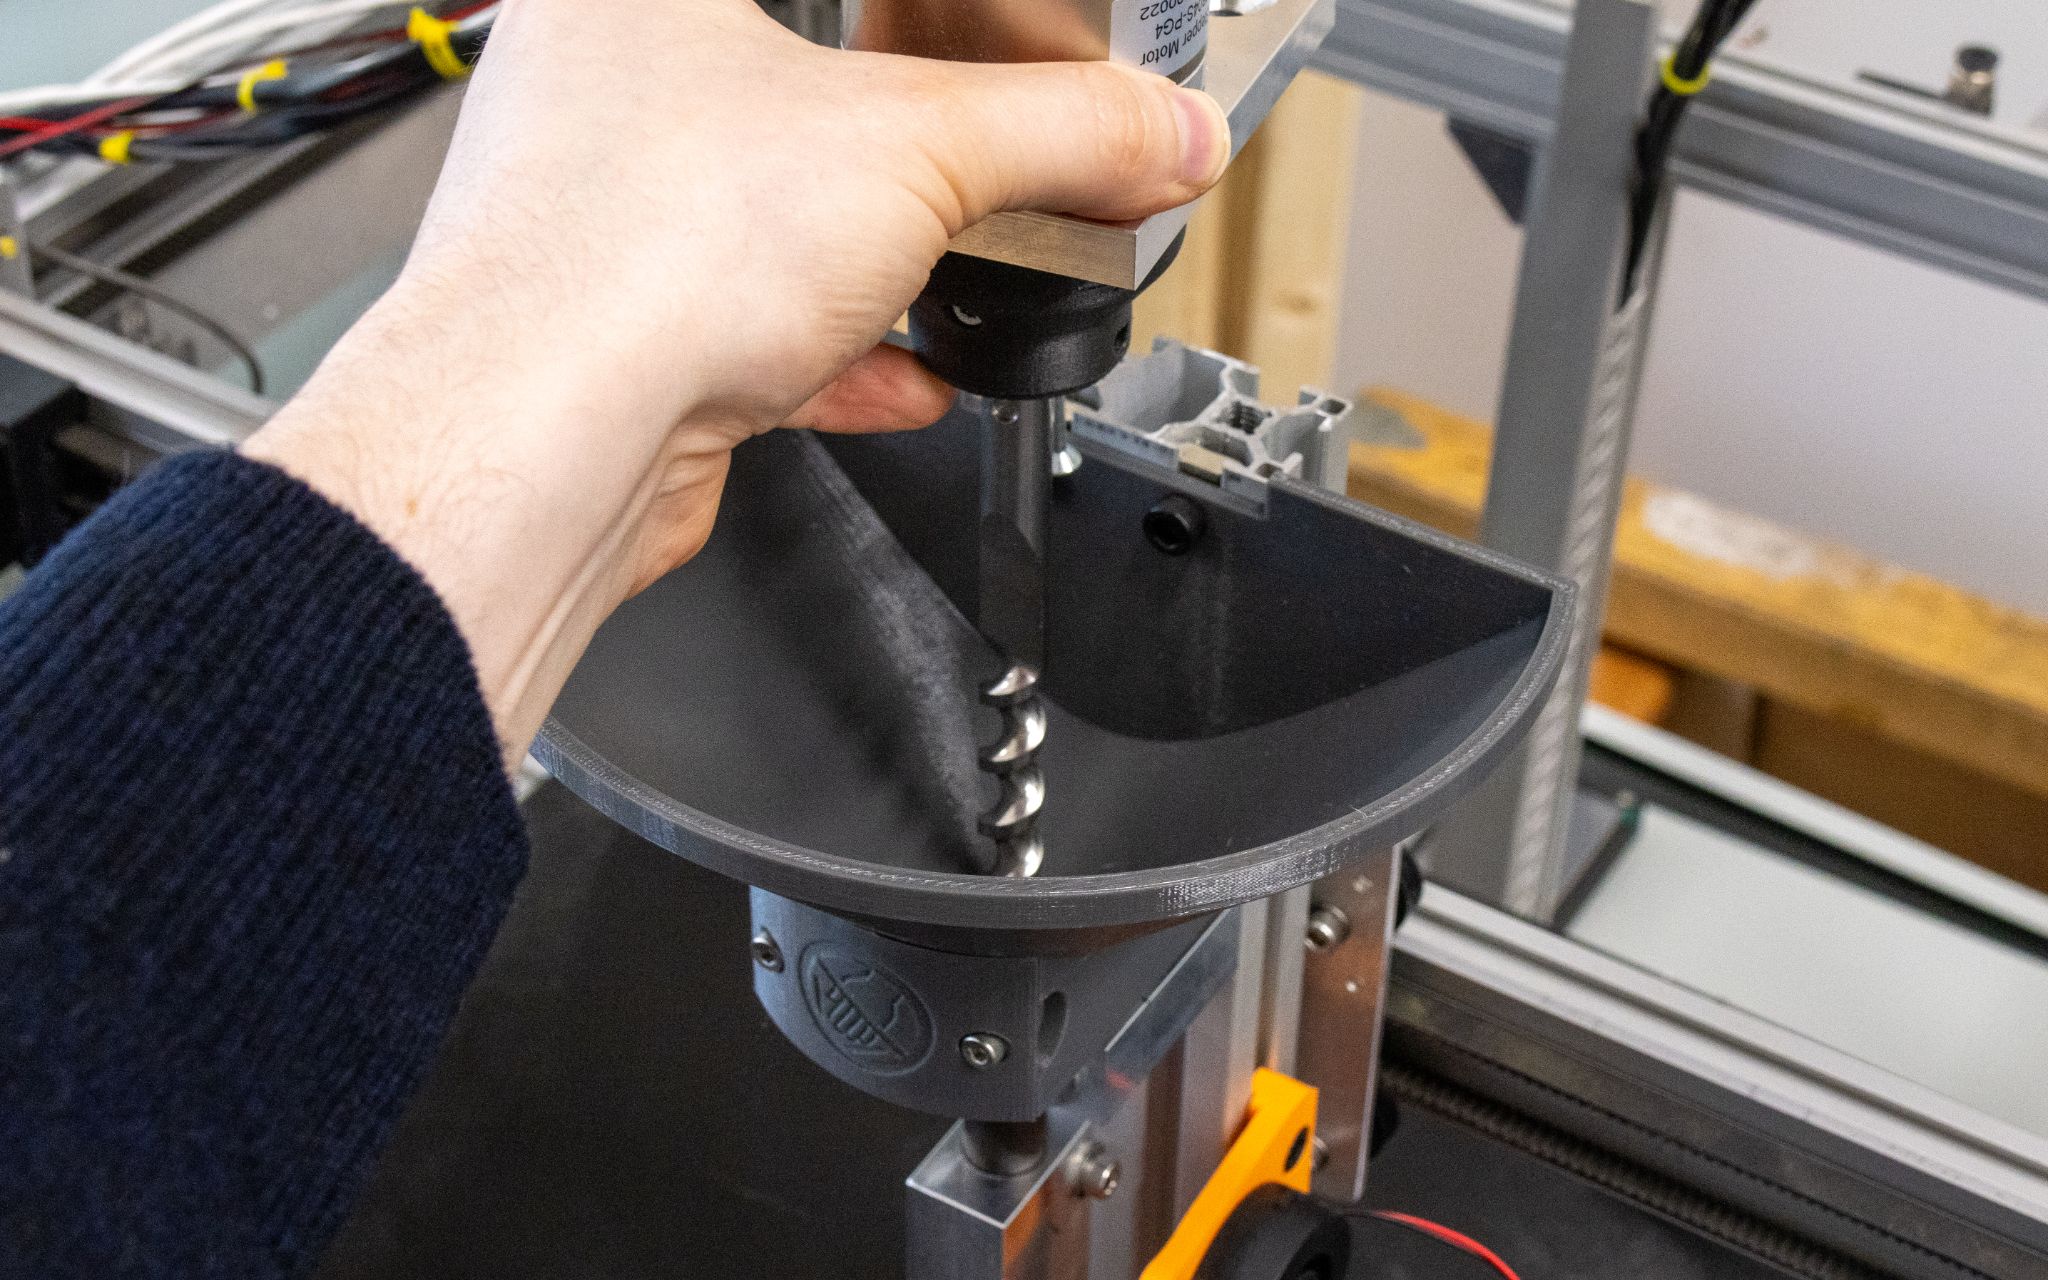
The screw of the pellet extruder, this draws the plastic down into the melt zone and compresses it.
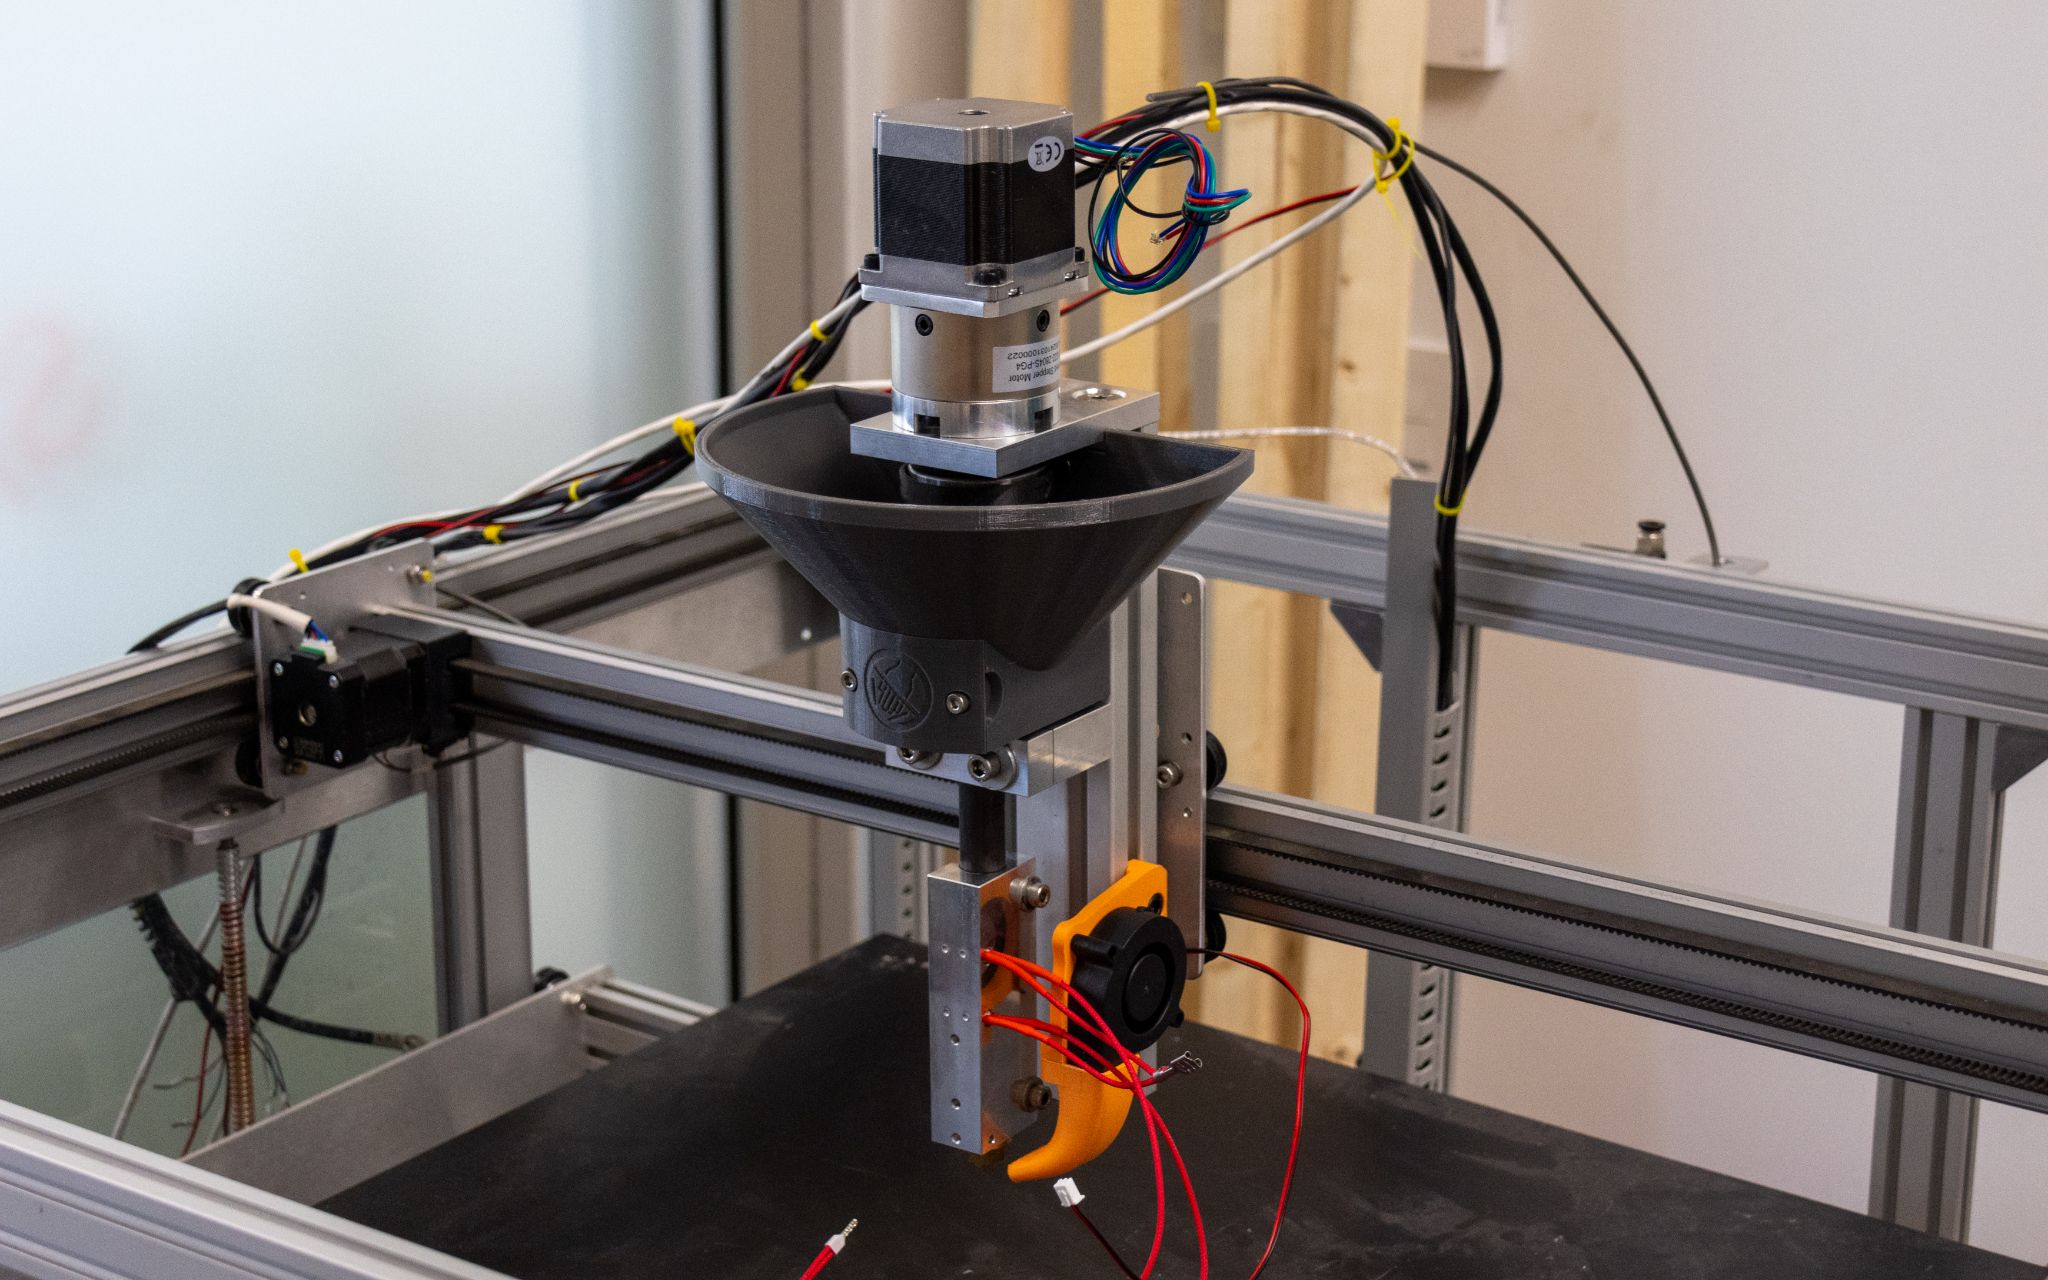
The whole in progress pellet extruder. Pellet extruders able to print full size material are often extremely expensive, starting at over $10k but by using parts from an at home filament maker, we can reduce that down to less than a tenth of the cost.
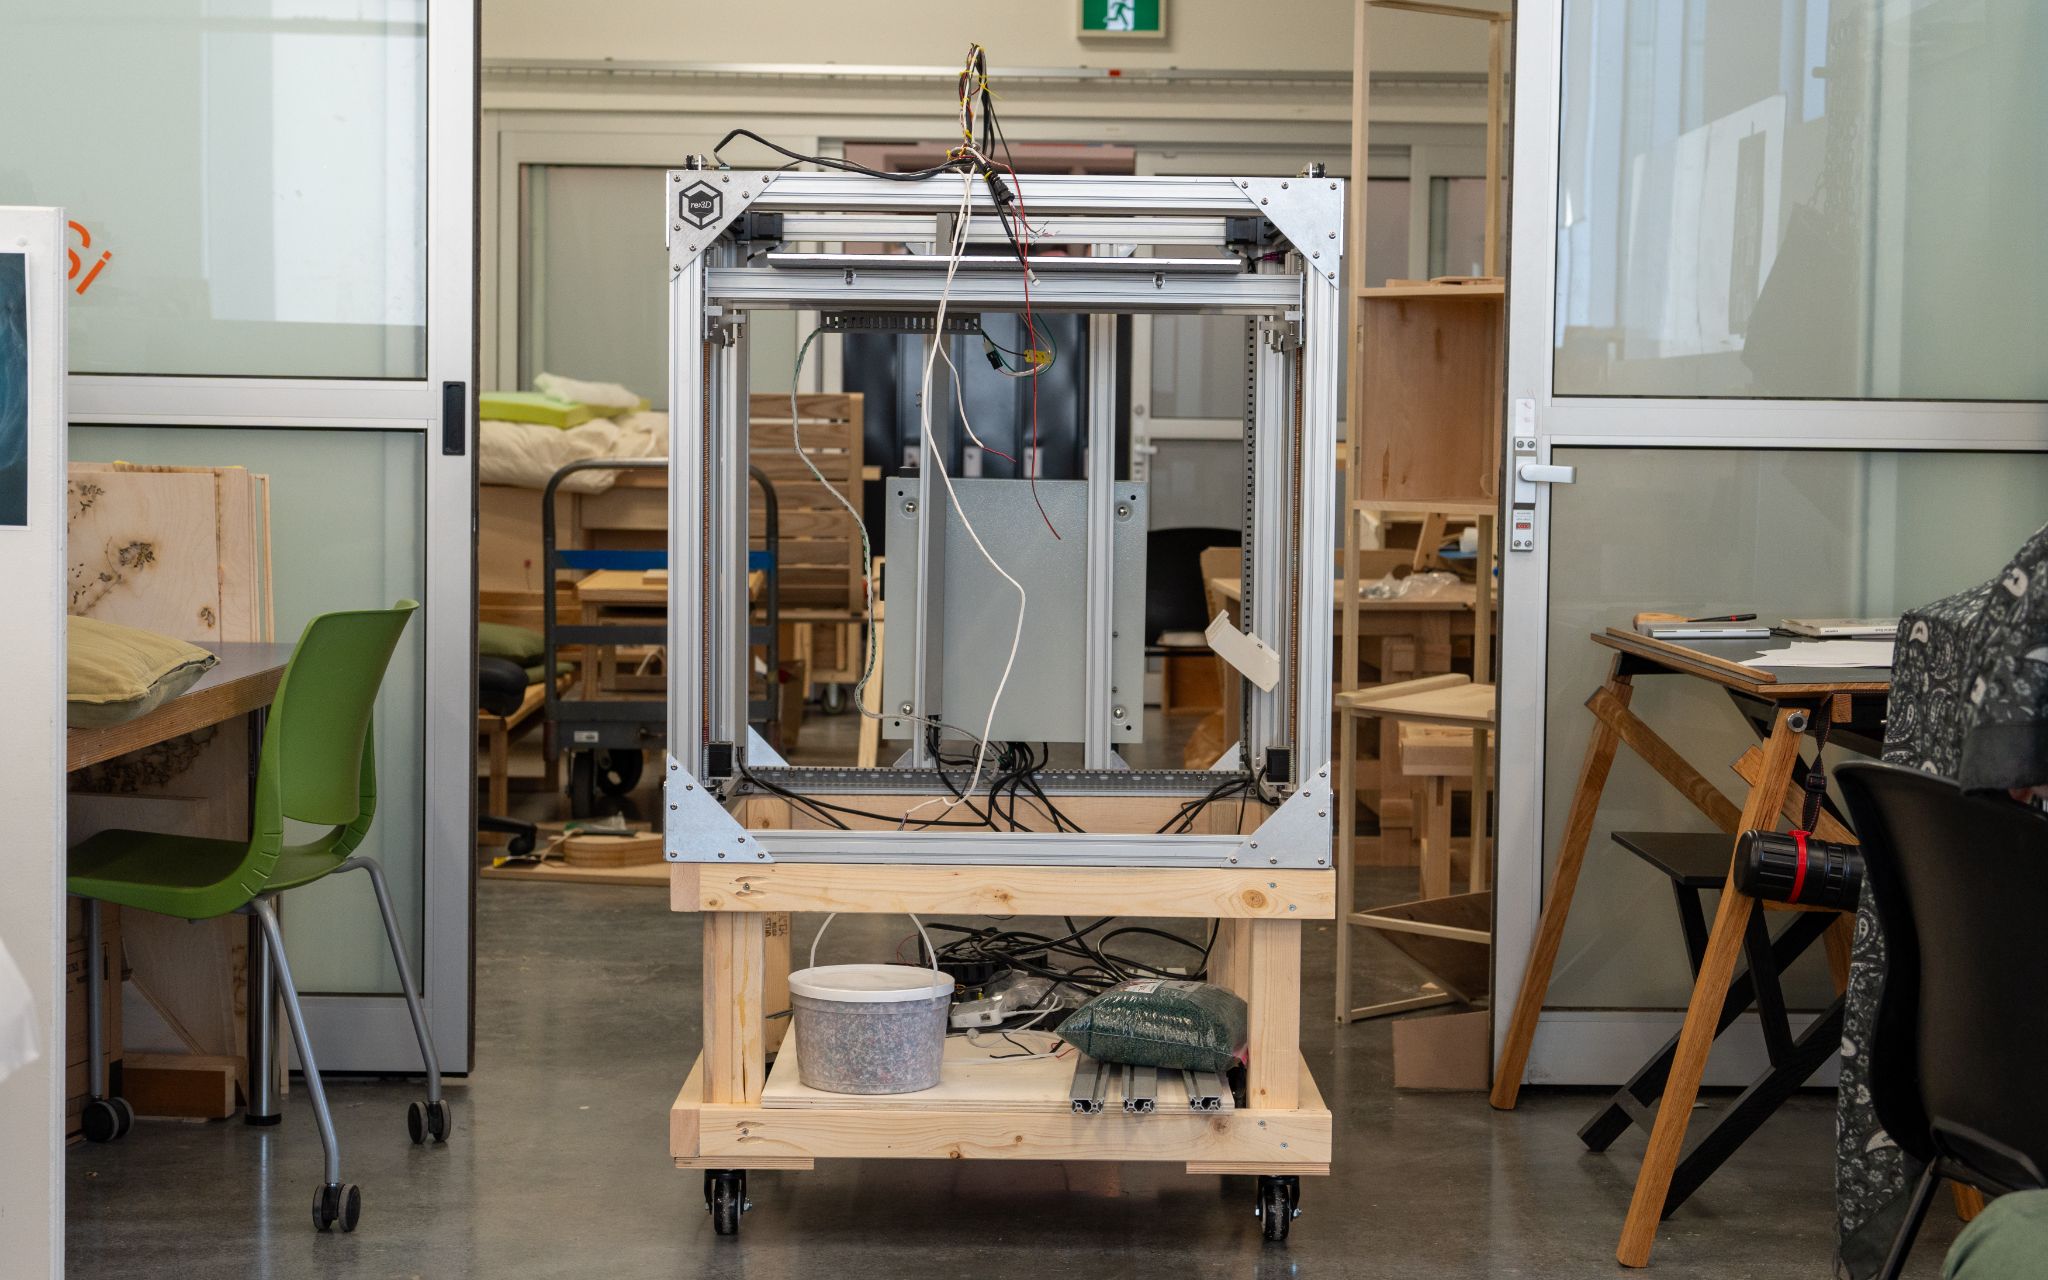
This is all being mounted on an old large format 3D printer, allowing us to print much larger, heavier duty parts, conducive to the thicker extrusions the pellet extruder will make; 2-3mm at a time vs ~.4mm for a regular 3D printer.
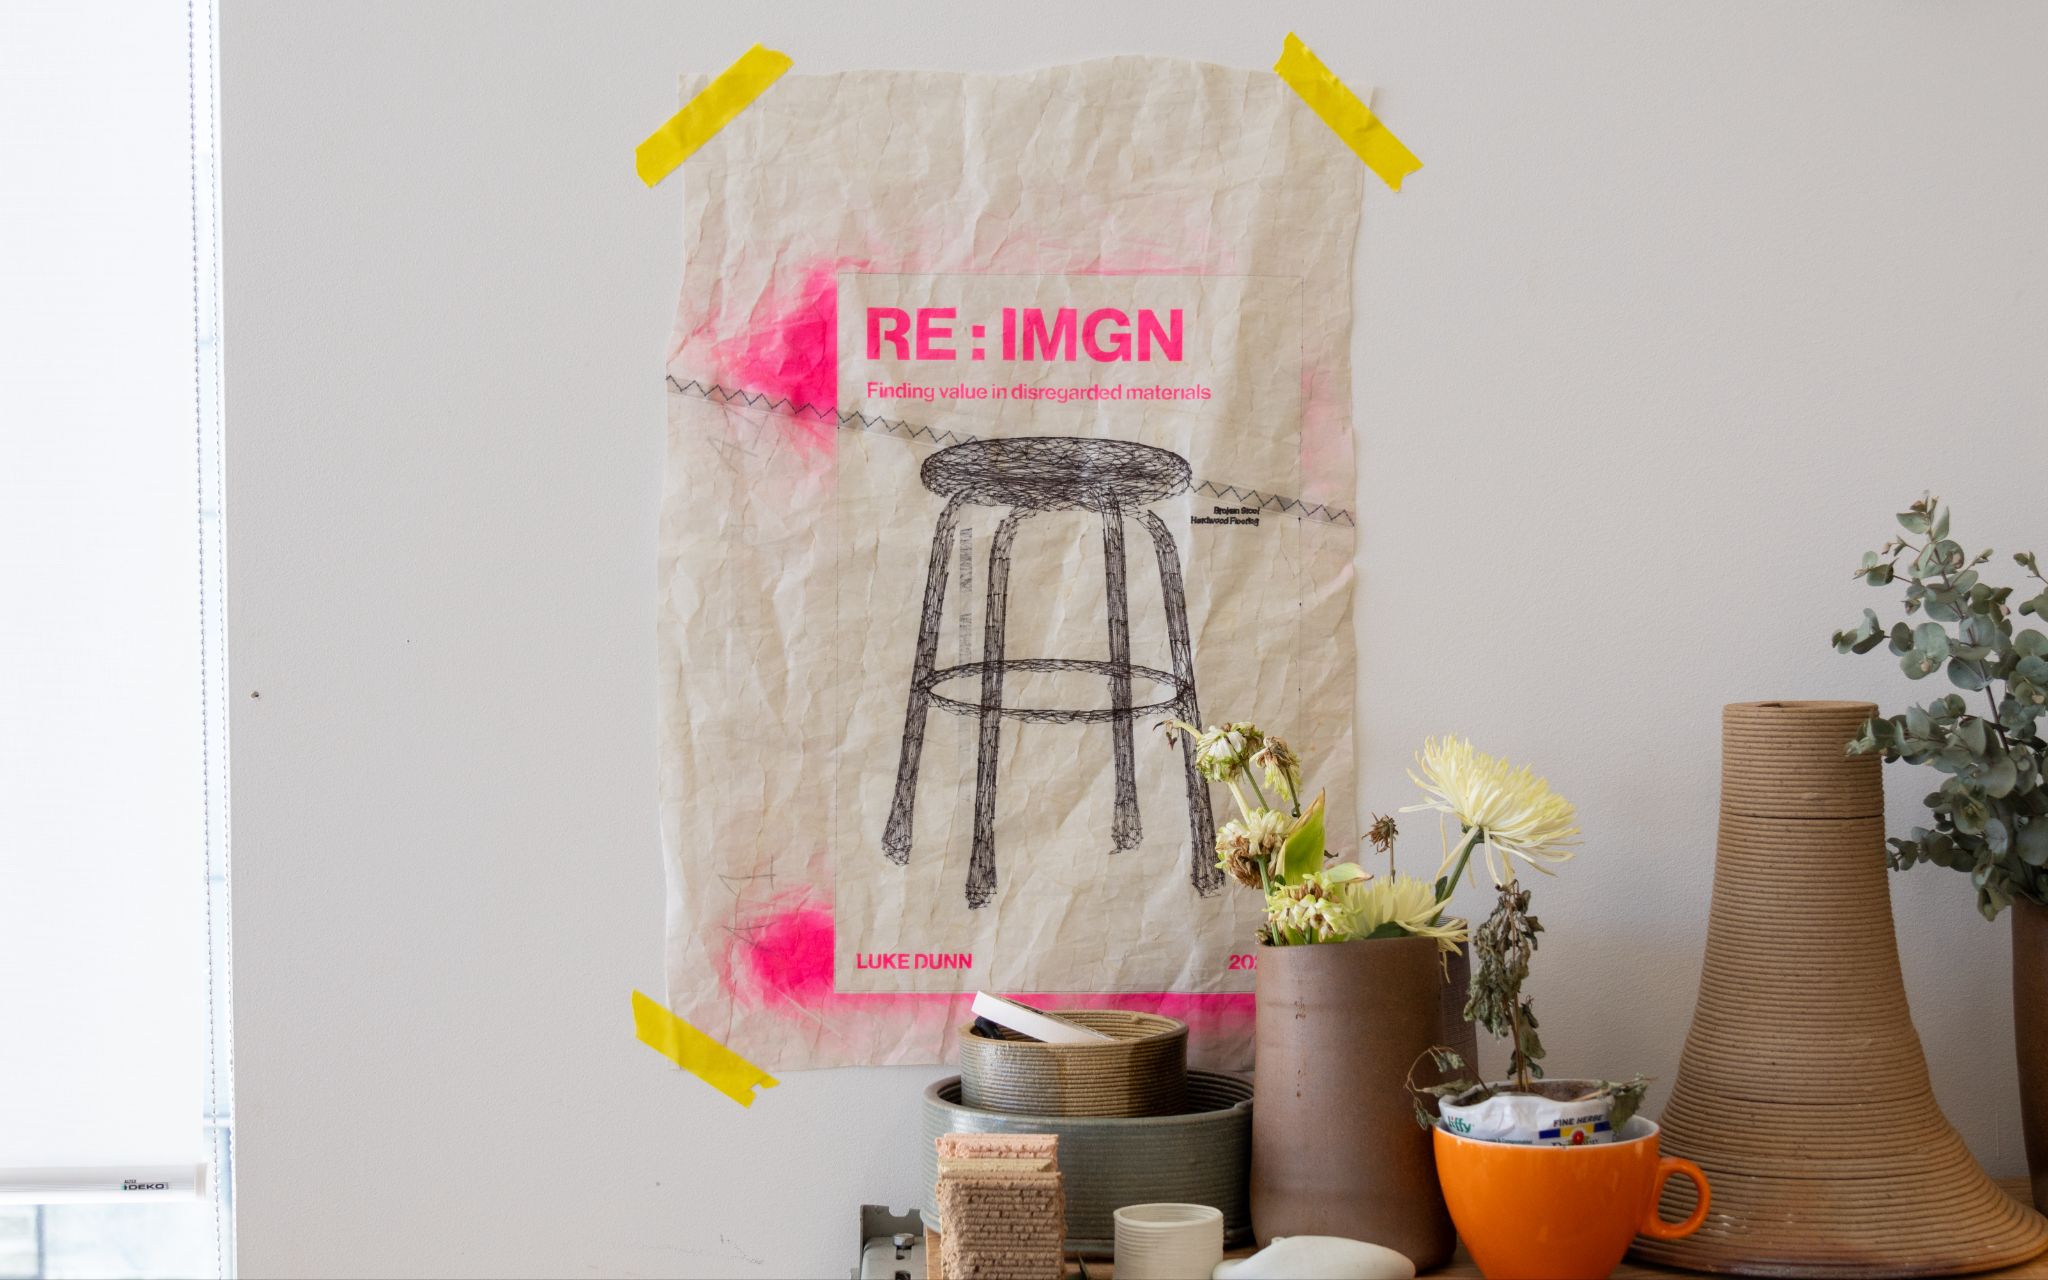
My poster for this project. Made by pen plotting on sailcloth and then using a spray paint stencil.
Thank you for reading this far! If you want to see more of my work, visit my instagram @lkd.design or my website at www.lkd.design. You can also email me directly using the box below!